
With over 38 million people calling it home, Tokyo is the most populated city on earth. Not only does that mean you could easily spend weeks there without being bored, it also means that there’s an abundance of things that travellers can (and should) do in the city. This is an overview of fifteen essential experiences for your first time in Tokyo.
I mean, the fact that you’re reading this post indicates that you don’t need any more reasons to visit Japan, right? With its cities like Osaka, Kyoto and Yokohama and its quaint villages like Shirakawa-go and Hakone, it’s easy to think that Japan should be a destination that’s a lot more popular. However, there are still some things you need to keep in mind before coming to this Asian country.
Either way, this list of essential Tokyo experiences will go a long way helping you plan your Japan itinerary. Your first visit to Japan will be overwhelming, and that’s okay. This list of things to do during your first time in Tokyo is here to help you find structure in the chaos that is the Japanese capital.
Note: I’ve said it numerous times, but you’ll want to purchase a JR Pass to help you get around Tokyo. Here’s why a JR Pass is a worthwhile investment.
Let’s do this.
Your first time in Tokyo should capture the most important things the city has to offer. This list will tell you what those things are. Check out the map embedded below to see where you can find the experiences mentioned here. (click here to reload the page if the map isn’t loading correctly)
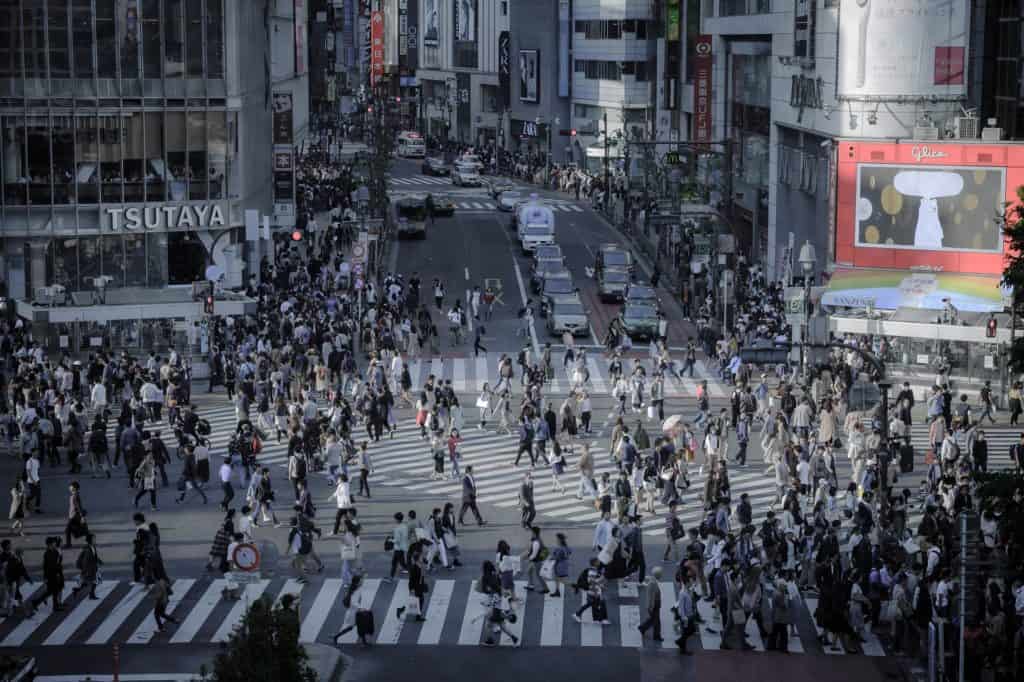
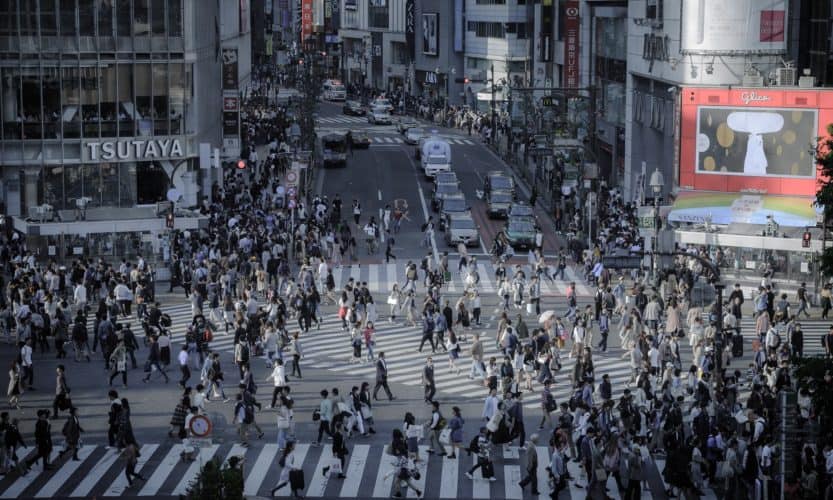
Not only is Shibuya Crossing the busiest and one of the best-known pedestrian crossings in the world, it’s also an iconic landmark in Tokyo and a symbol of modern times in Japan. Among the locals, it’s known as ‘Scramble Crossing’ because of its layout which also includes a diagonal crossing.
On your first visit to Tokyo, you could easily fill a day just wandering around Shibuya and taking in everything that the Japanese capital has to offer. Drink some coffee, listen to the sounds of the urban jungle and watch thousands of people cross the street at once.
From Tokyo Station or from Shinjuku Station: take the JR Yamanote Line to Shibuya Station. Take the Hachiko exit and you’ll have direct access to Shibuya Crossing.
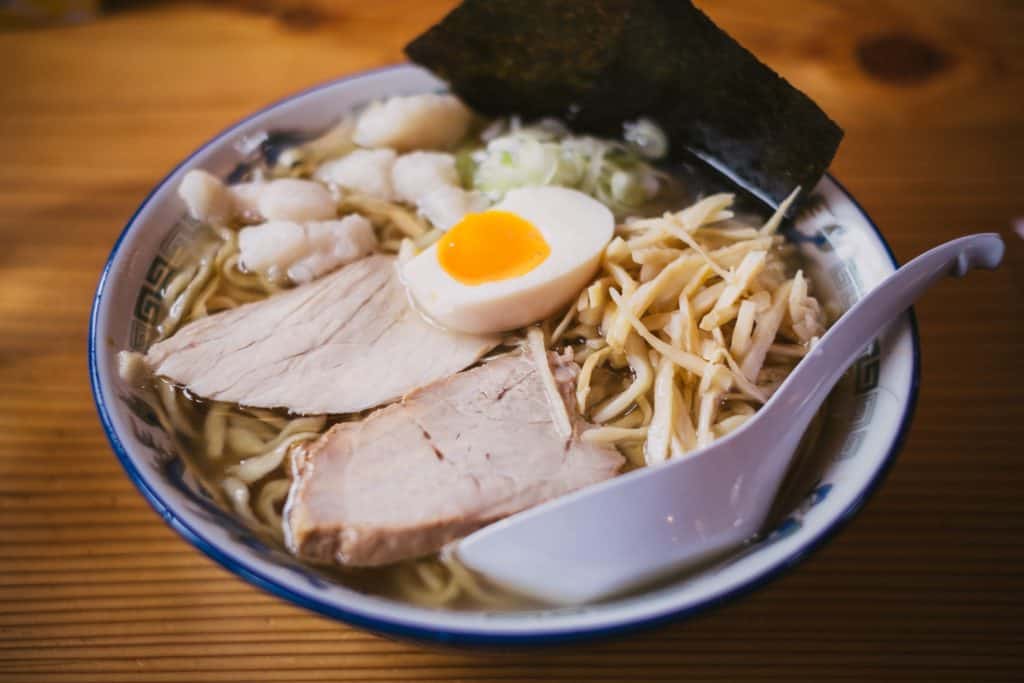
If Shibuya is Tokyo’s most technologically advanced district, Shinjuku surely is its culinary beating heart. As my family are well aware by now, I could rave about the bowl of ramen I had in Shinjuku all day. We picked a small ramen bar near one of Shinjuku’s train stations to go for lunch, and I had the best ramen of my life. Granted, I hadn’t really eaten ramen that didn’t come from a €0.50 packet of instant ramen that many times, but still.
For the real ramen experts among you: yes, I’m aware that the term ‘ramen’ encompasses many different kinds of noodle dishes in Japan. In case you’re unaware, there are several flavours, types of noodles, broths, toppings, and much more. If you’re looking for more information about varieties of ramen, there are tons of articles online.
In this district, you’ll find a broad range of places to eat ramen, from cheap noodle stands on the side of the road to high-end gastronomic restaurants. Anything ramen-related you can dream of, you’ll find it in Shinjuku.
Takeshita Street is the centre of Japanese youth culture. It’s a pedestrian shopping street that stretches 400 metres and it’s filled to the brim with kawaii boutiques, cafes, restaurants and clothing stores. It’s unlike anything you’ll ever see. Probably.
Many people believe that Takeshita Street is where kawaii culture originated. For this reason, the street is brimming with people who want to see what kawaii is all about during high season. And for this reason, I believe you should go there for your first time in Tokyo.
From Tokyo Station, Shinjuku Station or Shibuya Station, take the JR Yamanote Line to Harajuku Station. Takeshita Street starts across the road from the exit of Harajuku Station.
Okay, I know it sounds boring and it doesn’t seem like something you’d want to do on your first time in Tokyo. But hear me out.
Tokyo is home to some of the world’s biggest department stores, like Isetan, Sogo, Loft, PARCO, Tokyu and Hankyu (yes, I could go on, but I think you get the point I’m trying to make).
Whether you’re looking for a trendy new outfit, new home decor or stationery equipment for your next bullet journal adventure, you’ll find it in a department store in Japan. From tablecloths to a bottle of sunscreen, they’ll have everything you need.
Also, for those of you looking for the freshest and most delicious Japanese food that’s still relatively affordable: every department store you’ll visit has an entire floor dedicated to food. And, seeing as these buildings are massive, that’s a pretty big deal.

According to the Japan Amusement Machine and Marketing Association (yes, that’s a real thing), there are 4,856 registered arcades in all of Japan. Although there were over 40,000 in the industry’s prime time, arcade halls are still insanely popular in Japan.
In big cities like Osaka and Tokyo specifically, businessmen often spend an entire Saturday afternoon in an arcade hall trying to get the high-score on their favourite arcade machine. That’s something we can hardly even fathom, but it’s just a part of the arcade culture in Japan.
Fun fact: Japanese arcades don’t exclusively cater to teen guys and young men. They often have a whole floor (usually the top floor) dedicated to ‘purikura photo booths‘, which are mostly used by groups of teen girls who dress up and put on make-up for the perfect kawaii picture.
Visiting an arcade hall the first time you’re in Tokyo will give you a chance to dance to funky songs like nobody’s watching. You don’t have to worry about the Japanese people who are there to admire your moves, because you’ll likely never see them again in your life. This is your chance to go crazy.
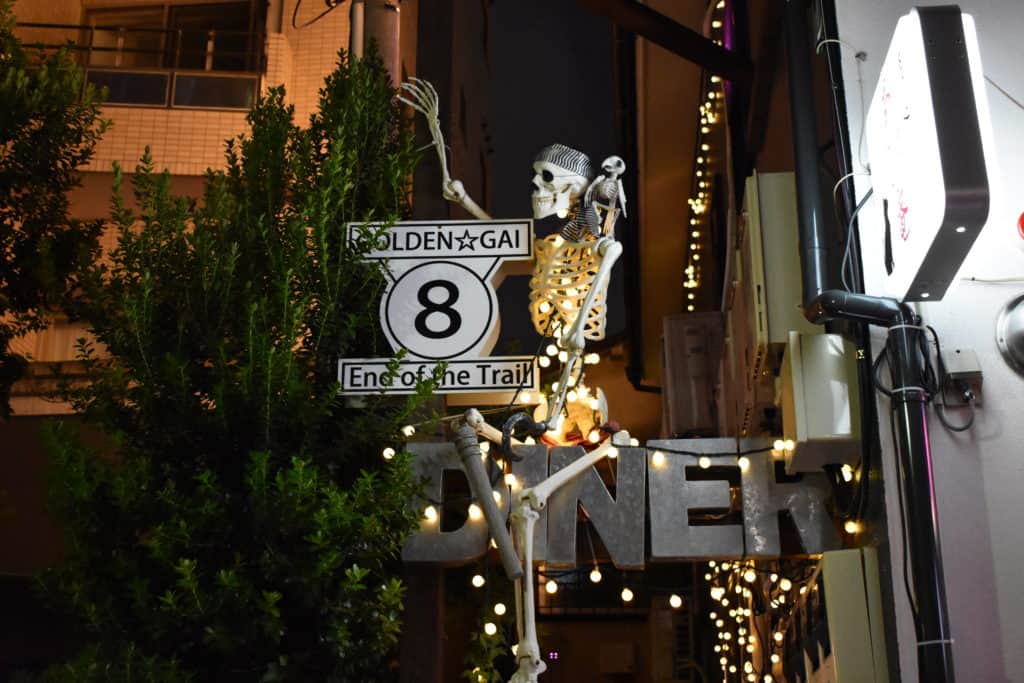
Golden Gai is a tiny area in Tokyo’s Shinjuku ward with a labyrinth of narrow alleyways that house nearly 200 tiny cafes. Considering the fact that the area only consists of six passageways, that’s impressive. These cafes and restaurants often only have enough seating space for a handful of people. Moreover, many bars only accept regulars because they don’t have enough space for travellers.
Tip: if you find an English menu outside, chances are that it’s safe for you to go inside as a traveller who doesn’t speak any Japanese.
The area was known as Tokyo’s red lights district before prostitution became illegal throughout the country in 1958. This is when Golden Gai started transforming into the almost cult-like Shinjuku neighbourhood it is today.
A great way to spend a night on your first time in Tokyo is to go bar-hopping in Golden Gai.
One of the most eye-catching things about this neighbourhood is its contrast with the surrounding area. While the ward of Shinjuku has been drastically changing for years and probably hasn’t looked the same for two consecutive days, the atmosphere in Golden Gai has largely remained unchanged.
From Tokyo Station, take the JR Chuo line to Shinjuku Station.
From Shibuya Station, take the JR Yamanote Line to Shinjuku Station.
When you arrive at Shinjuku Station, take the East Exit. Walk ahead towards the Shinjuku Ward Office and then turn right.
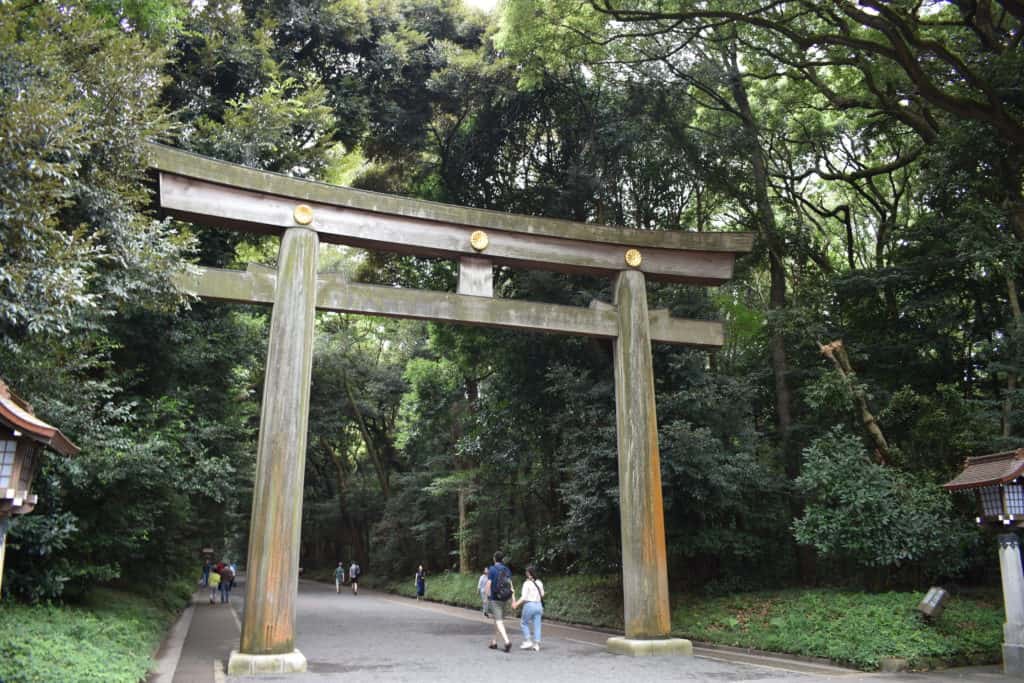
Meiji Shrine is a shrine located in Yoyogi Park, right next to Harajuku Station. It’s dedicated to Emperor Meiji, who opened Japan to the West in the 19th century, and his wife, Empress Shoken. This is the most famous Shinto shrine in Japan and it’s much more interesting and worthy of a visit than Senso-ji Temple.
In a Japanese context, it’s quite unusual to find a religious shrine in a big park in the city centre. It’s like entering a whole other world in the middle of the urban jungle that Tokyo represents.
If you want to witness a traditional Japanese wedding procession, Sunday mornings at Meiji Shrine are probably your best bet. We saw a Japanese couple get married here and it was quite spectacular.
Admission to this shrine is free and it’s open from sunrise to sunset.
From Tokyo Station, Shibuya Station or Shinjuku Station, take the JR Yamanote Line to Harajuku Station. Upon arrival in Harajuku, exit the station and turn right. Follow the path until you reach a concrete bridge that crosses the train tracks. Cross the bridge and you’ll see a large torii gate in front of you. This is the entrance to Meiji Shrine.
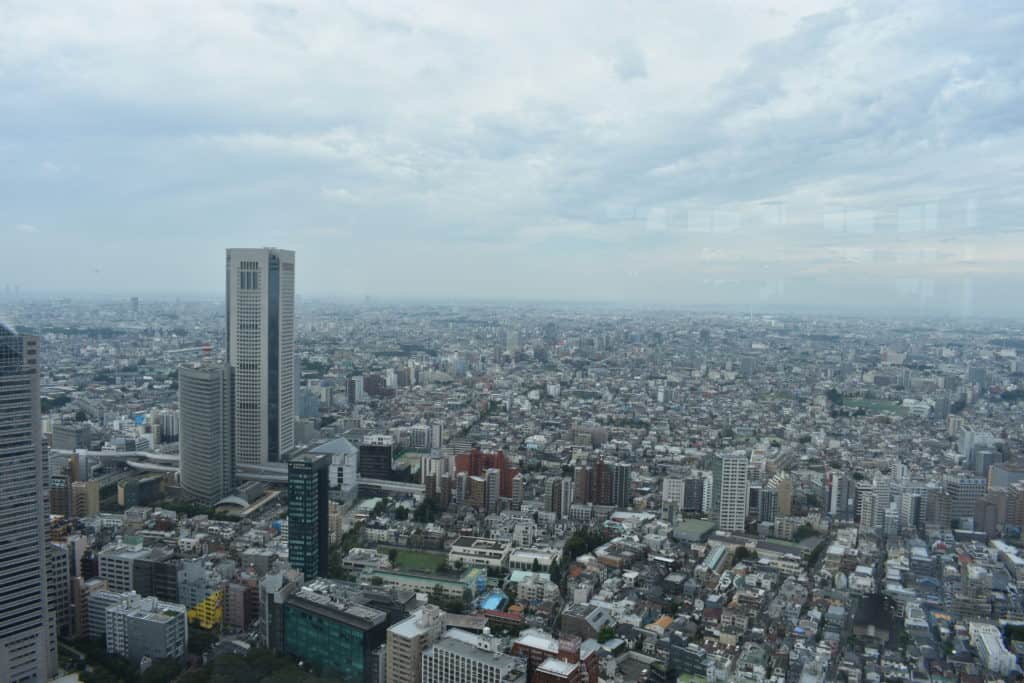
The administrative heart of Tokyo is located in Shinjuku, in the Metropolitan Government Buildings. They’re popular among travellers because of the free observation decks that offer breathtaking panoramic views of Tokyo. Although I wouldn’t recommend visiting these observation decks if you suffer from vertigo. Don’t say you weren’t warned.
Many people believe that the North tower is more interesting for travellers, because it’s open until later at night, making it a great spot for nightly panorama pictures or time-lapses.
Since it’s unlikely that you’ll come back to this building after witnessing it once, it’s a perfect experience for your first time in Tokyo.
So, as I mentioned, access to the observation decks is free of charge. The North Observatory is open from 9:30 am to 11 pm and the South Observatory is open from 9:30 am to 5:30 pm. Admission ends 30 minutes before closing time.
From Shibuya Station, take the JR Yamanote Line to Shinjuku Station.
From Tokyo Station, take the JR Chuo Line to Shinjuku Station.
When you arrive at Shinjuku Station, take the West Exit and follow the main road for about 10 minutes until you see two very similar tall buildings on your left hand side. Those two buildings are what you’re looking for.
Again, hear me out here.
Your first visit to Japan has to include a Japanese toilet experience. You might think toilets are nothing special, and justifiably so, but your first time in Tokyo will surprise you.
As can be expected from a highly technologically advanced country like Japan, these toilets have everything you could ever dream of in a toilet. (Just so we’re on the same page here, I’m not talking about Japanese squat toilets)
Toilets in Japan have features like a built-in bidet option – which is much more hygienic than toilet paper, by the way -, water pressure and temperature customisation, flushing sounds to help mask noises you don’t want other people to hear, heated seats, and much more.
I know this comes across like I’m obsessed with toilets, but you’ll understand after you’ve experienced it.
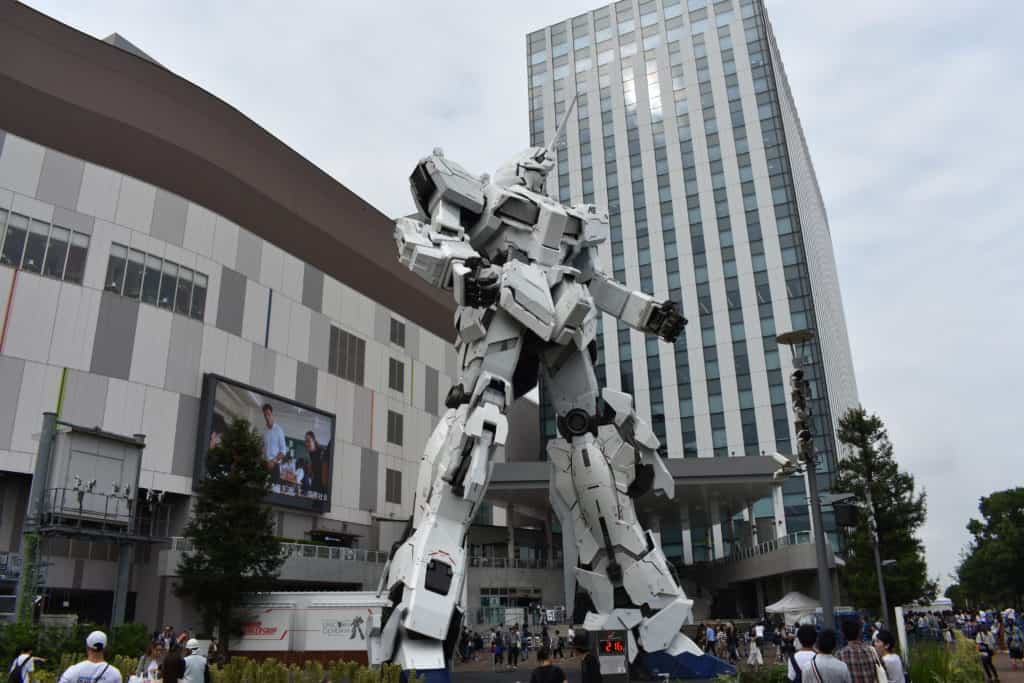
Odaiba is a large man-made island in Tokyo Bay, accessible from Tokyo by the Rainbow Bridge. It was originally founded as a military base in the 19th century, but it’s mostly known for its large shopping and entertainment districts nowadays.
The most important things to do and visit on Odaiba are the enormous Gundam statue (pictured above), the Rainbow Bridge and the replica of the Statue of Liberty. Other than that, you’ll want to spend some time in one of the many shopping malls on the island.
Odaiba is definitely worth an afternoon on your first visit to Tokyo.
Getting to Odaiba is a little trickier than getting to the other attractions covered in this article.
From Tokyo Station, Shibuya Station and Shinjuku Station, take the JR Yamanote Line to Osaki Station. In Osaki Station, purchase a ticket for the Rinkai Line (which is NOT covered by your JR Pass) and then take the Rinkai Line to Tokyo Teleport Station.
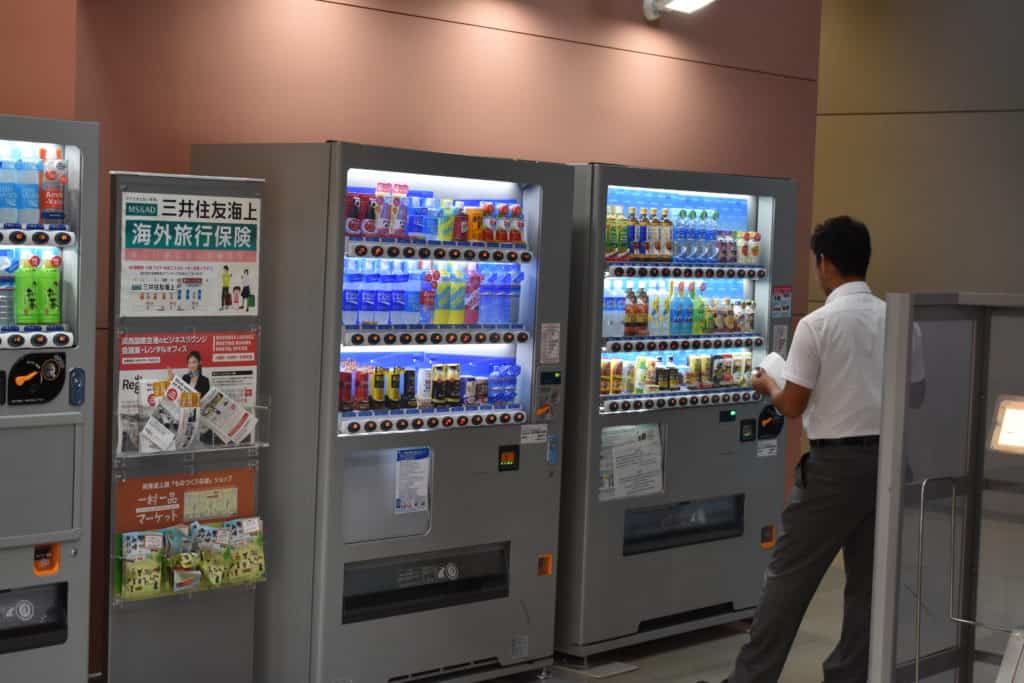
Vending machines of all kinds are not only popular in Tokyo, but throughout the entire country. To put this into perspective, Japan has one vending machine for every 23 inhabitants. That’s over 5 million vending machines spread throughout the country. Yes, really.
These machines can be found on every street corner and they usually sell refrigerated drinks (but some of them are known to sell some crazy things).
For visitors, these vending machines have almost become a tourist attraction, but for the locals, it’s mostly just a cheap, convenient way to get some well-needed refreshment.
For you, your first time in Tokyo is the perfect moment to experience the magic of these vending machines for yourself.
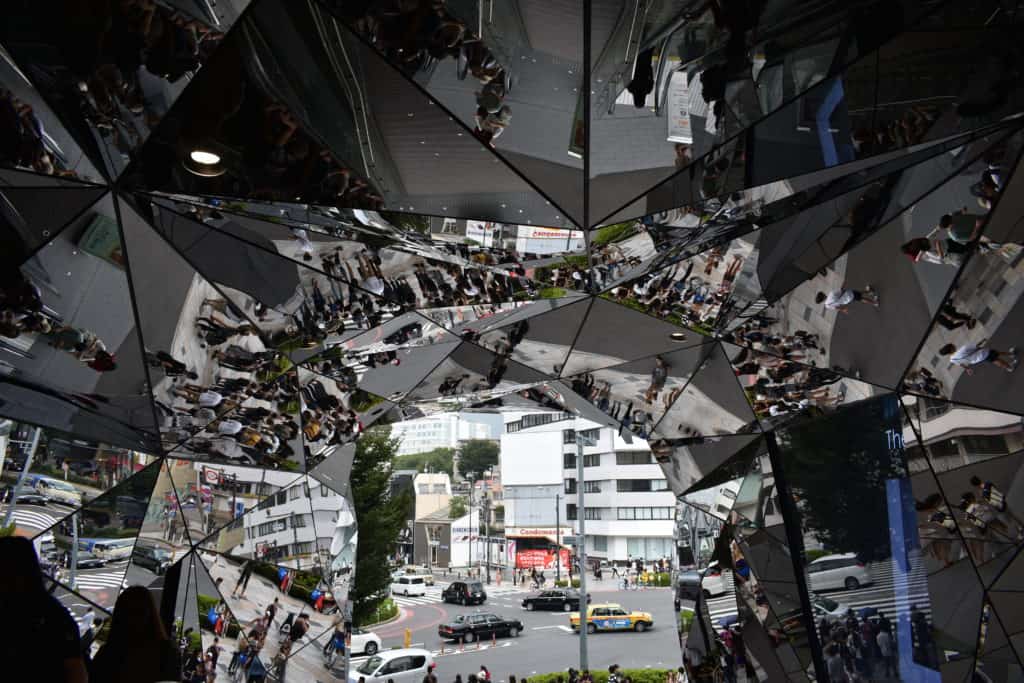
New York City has Fifth Avenue, Paris has the Champs-Élysees and London has Oxford Street. Tokyo has Omotesandō. This is Tokyo’s luxury shopping district that houses international brand boutiques and fashion flagship stores for brands like Dior, Gucci, Louis Vuitton and Yves Saint Laurent.
You can’t really not include a stroll along Omotesandō in your itinerary for your first time in Tokyo.
If you’re Irish, you have another reason to visit Omotesandō: it’s home to Tokyo’s annual Saint Patrick’s Day Parade. And even if you’re not Irish, it’s still a sight to behold.
Side note: if you’re looking for the place that’s pictured above, it’s called Tokyu Plaza Omotesando Harajuku. You and your Instagram feed are welcome.
From Tokyo Station, take the Maronouchi Line to Akasaka-Mitsuke Station. Transfer to the Ginza Line and get off at Omote-Sando Station.
From Shibuya Station, take the Ginza Line to Omote-Sando Station.
From Shinjuku Station, take the JR Yamanote Line to Shibuya Station and transfer to the Ginza Line to Omote-Sando Station.
Note: the Maronouchi Line and the Ginza Line are not covered by the JR Pass.
I mentioned Yoyogi Park earlier as the park that’s home to the Meiji Shrine. However, that’s not everything that one of the biggest parks of Tokyo has to offer.
During cherry blossom season (early April in most major central cities like Tokyo, Osaka and Kyoto), Yoyogi Park is the perfect place to sit down for a romantic picnic with your significant other or with your other travel companions.
However, cherry blossom season only lasts for about two weeks a year and there are fifty more weeks in which you can visit Tokyo for the first time. Should you be there in one of those fifty weeks and have some spare time on a Sunday, you might want to head to the Harajuku Entrance to Yoyogi Park.
This is where rockabilly dance crews gather every week to perform to music from the fifties. These dancers often look like they took a time machine to come to the twenty-first century, dressed in leather jackets and rocking slicked-back hairdos.
Keep in mind that there’s no fixed time for these performances, so you’ll have to be a bit lucky to witness them.
These dancers don’t do this to make money, but they’re just in it for entertainment. L’art pour l’art.
From Shibuya Station, Shinjuku Station and Tokyo Station, take the JR Yamanote Line to Harajuku Station and take the West Exit.
The infamous tuna auction of Tsukiji fish market is no longer to be found at Tsukiji. It moved to Toyosu Market, on one of the man-made islands in the harbour of Tokyo.
The fish market and tuna auction, now located at Toyosu, is pretty much what it says on the tin. In this building, you’ll find huge frozen tunas being auctioned off and fresh fish, seafood and sushi being prepared right before your eyes.
You can’t actually access the auction hall if you’re not planning on buying anything, but you can admire the fascinating tuna auction from a viewing platform up above.
If you don’t want to get up early during your first time in Tokyo, you should do it anyway. This fish market is worth it.
From Tokyo Station, take the JR Yamanote Line to Yurakucho Station and transfer to the Yurakucho Line. Get off at Toyosu Station and transfer again to the Yurikamome Line. Get off at Shijo-Mae Station.
From Shibuya Station, take the Hanzomon Line to Nagatacho Station and transfer to the Yurakucho Line. Get off at Toyosu Station and transfer again to the Yurikamome Line. Get off at Shijo-Mae Station.
From Shinjuku Station, take the Chuo-Sobu Line (Local) to Ichigaya Station and transfer to the Yurakucho Line. Get off at Toyosu Station and transfer again to the Yurikamome Line. Get off at Shijo-Mae Station.
Note: the Yurakucho, Yurikamome and Hanzomon Lines are subway lines and are NOT covered by the JR Pass.
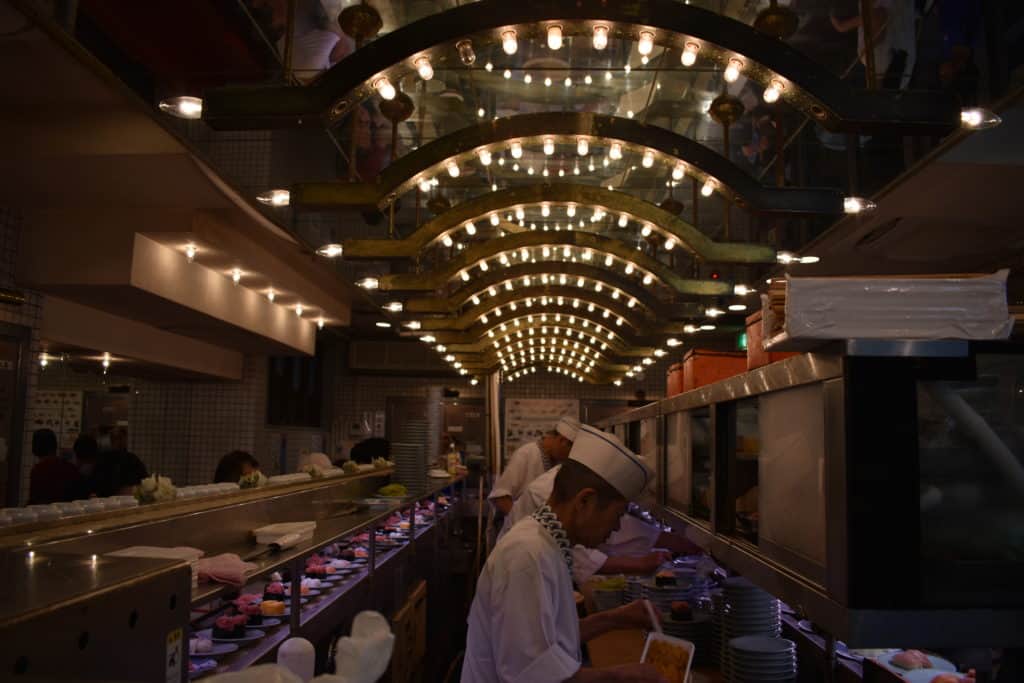
I’m still talking about food. I would apologise, but I’m not really sorry – after all, you’re trying to make your first time in Tokyo unforgettable, and Japanese food is an essential part of that experience.
In case you’re unaware, this is what a sushi belt is: there’s a rotating conveyor belt that transports sushi in a restaurant-like room, constructed around a central area where chefs are preparing fresh sushi and sashimi before your eyes. (As you can see in the video below)
The sushi you’ll eat in these establishments will be nothing like store-bought sushi you can buy at home – it’s as fresh as it gets and the taste is extraordinary.
Surprisingly, the price tag attached to this meal won’t set you back too much. Many sushi belt places have differently coloured plates that indicate sushi of different prices. You take the plates from the belt, eat the sushi and keep the plates. Then, when you’re about to pay for your food, a waiter counts your plates and calculates how much you have to pay.
These places give travellers like yourself an authentic view into life for the locals. And isn’t that what your first time in Tokyo should be about?
Now, you’ve got a great idea of how to rock a visit to the Japanese capital.
If you got through all these experiences on your first time in Tokyo, you’ve got a strong foundation in case you’re ever coming back to this city in the future and you need to show your friends around. You’ll be able to impress them with your knowledge of Tokyo and everyone will thank you.
And on that note, I’ll leave you.
Is there anything essential I missed in this list? Let me know in a comment!
Thank you for reading!
-S
PIN IT!

Everyone who has ever boarded a flight that lasted more than six hours will know that it’s not easy to stay sane. After all, you’re flying in a big metal bird at an altitude of over 10 km. However, there are some things you can do to make your stay in the metal bird more enjoyable – or at least less horrible. This is how to survive a long-haul flight.
In this post:
What to do during a long flight
How to stay healthy on a long-haul flight
How to stay comfortable on a long flight
If you take some small measures to change your cabin baggage around, you’ll go a long way to making your long-haul flight more pleasant. You just need to make sure to pack the right things in your cabin bag. After all, you don’t want to end up on a 12-hour flight only to realise that you’ve left your headphones in your checked baggage.
Also, don’t pack liquids over 100 ml. Just don’t.
I don’t care about airline regulations, I want to skip ahead
All airlines have regulations around cabin baggage. These policies usually regulate the maximum allowed size for your cabin baggage as well as the maximum weight.
Most traditional airlines usually stick to the following dimensions for cabin baggage: 56 x 45 x 25 cm. However, as more low-cost airlines pop up and become more popular, it’s important to keep in mind that these airlines tend to save money by using smaller maximum baggage dimensions and charging more for bags that don’t fit those dimensions. For that reason, you have to be extra cautious when you’re booking a flight with one of those low-cost carriers, because the extra fees can end up taking a considerable bite out of your budget.
For your convenience, here’s an overview of the cabin bag dimensions and max weight for most major low-cost carriers.
Disclaimer: this post was written and uploaded on 14 December 2018. This information may be outdated by the time you’re reading this. These regulations and policies reflect a passenger travelling in economy class or the carrier’s equivalent.
On Ryanair flights, you’re only allowed to bring one small personal bag (max. 40 x 20 x 25 cm) into the cabin, which must fit under the seat in front of you. For £6, you can add priority boarding and one more cabin bag (max. 10 kg), which can be stored in the overhead bins (providing the other bag fits under the seat). For £8, you can add a checked bag (max. 10 kg) which you must drop off at the check-in desk at the airport.
Bringing another bag that you haven’t paid for or bringing a bag that is too heavy will result in a £25 fee one way.
Vueling flights allow you to bring one piece of hand luggage (max. 55 x 40 x 20 cm, max. 10 kg). This bag can be stored in the overhead bins. You’re also allowed to bring another small bag or case (max. 35 x 20 x 20 cm) as well as a bag with purchases made at the airport. Both of these must fit under the seat in front of you.
If your bag is too heavy, too big or you bring too many bags, you will be charged €35 one way.
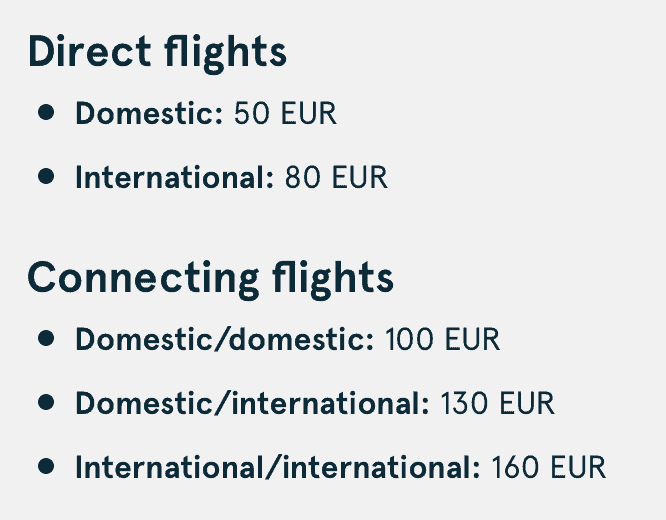
Norwegian Air travellers are allowed to bring one carry-on bag (max. 55 x 40 x 23 cm) and one small personal item (max. 33 x 25 x 20 cm) that fits under the seat in front of you. The combined weight of these two bags must not exceed 10 kg.
The fees for oversize or overweight baggage are steep at Norwegian. They can be seen in the screenshot below (and yes, that’s just one way).
JetBlue allows its passengers to bring one carry-on bag (max. 55 x 35 x 22 cm) and one small personal bag (max. 43 x 33 x 20 cm) on board. There is no weight restriction on carry-on baggage on JetBlue flights.
I was unable to find information online about fees for oversize cabin baggage on JetBlue flights.
Southwest passengers can bring one carry-on bag (max. 60 x 40 x 25 cm) and one personal item (max. 46 x 34 x 21 cm) that fits under the seat in front of you. There is no specified weight restriction for cabin baggage on Southwest flights.
I was unable to find information online about fees for oversize cabin baggage on Southwest flights.
On easyJet flights, you can bring one carry-on bag (max. 56 x 45 x 25 cm, including wheels and handles). There are no weight restrictions but you must be able to lift it into the overhead locker, according to easyJet’s website.
If your carry-on baggage doesn’t fit in the size restrictions at the bag drop desk, you will be charged £37 to check the bag into the aircraft hold. If you only realise your bag is oversized at the boarding gate, you will be charged £47.
Wizz Air allows its customers to bring one carry-on bag (max. 40 x 30 x 20 cm, max. 10 kg) which should fit under the seat in front of you.
Wizz Priority travellers can also bring one extra trolley bag (max. 55 x 40 x 23 cm, max. 10 kg). Wizz Priority can be purchased online (€5 – €15) or at the airport (€25) and it’s non-refundable.
I was unable to find information online about fees for oversize or overweight cabin baggage on Wizz Air flights.
Now that all the boring stuff about baggage allowances, policies and regulations is out of the way, let’s take a look at what else you can do to make your cabin baggage more useful for a long-haul flight.
Though there are definitely similarities between the two, surviving a long flight is a little different from surviving a short flight. One of those differences is that you’ll probably want to be asleep for a portion of the long flight.
You can take some precautions and bring some items to make falling asleep on a noisy flight easier.
If you pack a decent sleep mask, some earplugs and a travel pillow, your odds of actually getting some sleep are already way better than that guy who’s trying to fall asleep with a sweater as a pillow.
Yes, that was me on my way from Frankfurt to Osaka. I’ll happily admit I wasn’t prepared for my long flight.

If you’re travelling with cabin baggage only, by all means, get as close to the weight limit as you can. However, if you also have a checked bag, you should consider keeping your cabin baggage as light as possible.
Now, I’m not saying that you can’t get away with throwing some clothes in a trolley that you use as hand baggage. I’m specifically talking about your ‘personal item’ here, assuming the airline you’re flying with allows you to bring one.
Only pack the essentials in your backpack / purse / whatever you’re using as personal item (keep reading to find out what the essentials are). The reason for this is that your personal items has to fit under the seat in front of you while you’re flying. So, the bigger your bag is, the less legroom you have.
And personal space really isn’t something you want to compromise on during a long flight, is it?
On the one hand, anyone who has ever been on a long-haul flight will be able to confirm that airplane food is, well, not the best. Especially in economy class. Granted, it gives you precisely the amount of nutrients you need to survive the flight, but let’s just call it what it is: airplane food is bad.
By the way, did you know that airplane food uses up to 30% more sugar or salt to make it taste like it would on the ground?
On the other hand, you don’t want to get a sugar rush after eating too many sweets, only to feel drained and puffy shortly afterwards.
The perfect solution for this problem is to bring your own snacks, but not just any snacks: to survive a long flight, you’ll need some slow-energy release snacks. These contain healthy carbohydrates that slowly release the energy to the body over a longer period of time.

Some examples of excellent snacks to bring on a long flight:
Nowadays, most planes that carry out long-haul flights are equipped with personal sockets for every passenger. That’s excellent news for the digital-style traveller, who spends his or her time listening to music and playing games on an iPhone.
Some essential electronics to bring on your flight:
Of course, I’m not saying you won’t survive a flight without all of these. Adjust the list according to your own taste and travel style.
What to do, what to do… Here are some things that will help you survive the boredom of a 12-hour flight.
Chances are that your flight has some kind of night-time in it. Whether it’s night-time at your take-off airport, night-time in the time zone you’re arriving in, or something in between. Admittedly, the quality of sleep you’re likely to get on a plane isn’t going to be very high. But if there’s ever a time you can justifiably sleep to fight boredom, it’s a long-haul flight.
If you’re going to sleep on a plane – which isn’t an easy task, admittedly – you’ll have to be prepared to sleep. Obviously.

Bringing your own sleeping kit (remember: sleep mask, earplugs, travel pillow) to a long flight will go a long way to helping you sleep. Other than that, coming to the airport fairly well-rested also helps. I know, it seems counterintuitive, but trust me on this one.
Now, all that’s left for you to do is close your eyes and doze off. Sweet dreams!
Okay, so maybe you don’t feel like sleeping. Or your flight isn’t exactly at a time when you should be sleeping. In that case, sit back and relax, because there’s really nothing else worthwhile for you to do.
Here are some simple tips to help you fight boredom on a long-haul flight:
There are many things that can go wrong on a long flight, but you can only control so much. One of those things you are in control of is how much the airplane influences your health. Here are some tips to help you stay healthy during a long-haul flight.
One of the most common tips for people on a long-haul flight is to move around. If you’ve never been on such a flight before, you might think it’s weird to just get up in the middle of the flight, but it really isn’t. People move around all the time, and if you’re just taking a walk to get your blood flow going again, nobody is going to give you any weird looks.
Stand up and walk around the aisle at least every two hours. This will help you fall asleep more easily and it will prevent blood clots.
Other than that, you can also do small exercises in your seat if you don’t feel like getting up or if you’re stuck in a window seat and the passenger next to you is fast asleep. Here’s a list of easy exercises to do on an airplane.
One last consideration to make on a long-haul flight is whether you want a window seat or an aisle seat. A window seat, on the one hand, will graciously allow you a chance to fall asleep without being disturbed by other passengers. You’ll also be able to look outside more easily, if that’s what you’re into. An aisle seat, on the other hand, gives you more leg room and easier access to the aisle in case you want to get up or go to the bathroom.
In the end, it all comes down to personal preference and priorities.
As you’ve probably realised by now, flying dehydrates you. The air circulation system in an airplane causes the humidity to be around 10-20%. Compare that to the regular 30-60% on the ground and you’ll know why you need to keep drinking water.
Professionals recommend you drink about 250 ml (8 oz) of water for every hour you’re in the air. Also, if you can help it, avoid any kind of alcohol. It tends to dehydrate the body as well, however counterintuitive that might seem.
Deep vein thrombosis (DVT) is the formation of blood clots in deep veins, such as the ones in your legs. It doesn’t always come with visible symptoms, but if it does, these are the most common ones:
Since sitting on an airplane for extended amounts of time (ahem, such as a long-haul flight) slows the blood circulation, it increases the risk of DVT.
Some things you can do to prevent DVT on a long flight:
Now. You’re staying healthy, you’re not drinking too much alcohol, you’ve got your movies ready to be binged and you feel like you can sleep for hours.
How do you stay comfortable for a long amount of time with relatively little space to move around? Well, here’s how.
This goes without saying, really. If you want to be comfortable on a long flight, you’re going to have to wear comfortable clothes. I’m thinking simple shirt, sweatpants, sweater and sneakers. How’s that for a comfortable alliteration, huh?
Of course, you might have to compromise on your fashion sense for this plane ride, although some people want to convince you otherwise. I’d say the sacrifice is more than worth it if it means you’ll get a more enjoyable flying experience in return.
If you’re really worried about not getting the comfort you need in economy class, why don’t you consider upgrading to premium economy (or even business class)?
There are quite a few ways to score an upgrade to premium economy.
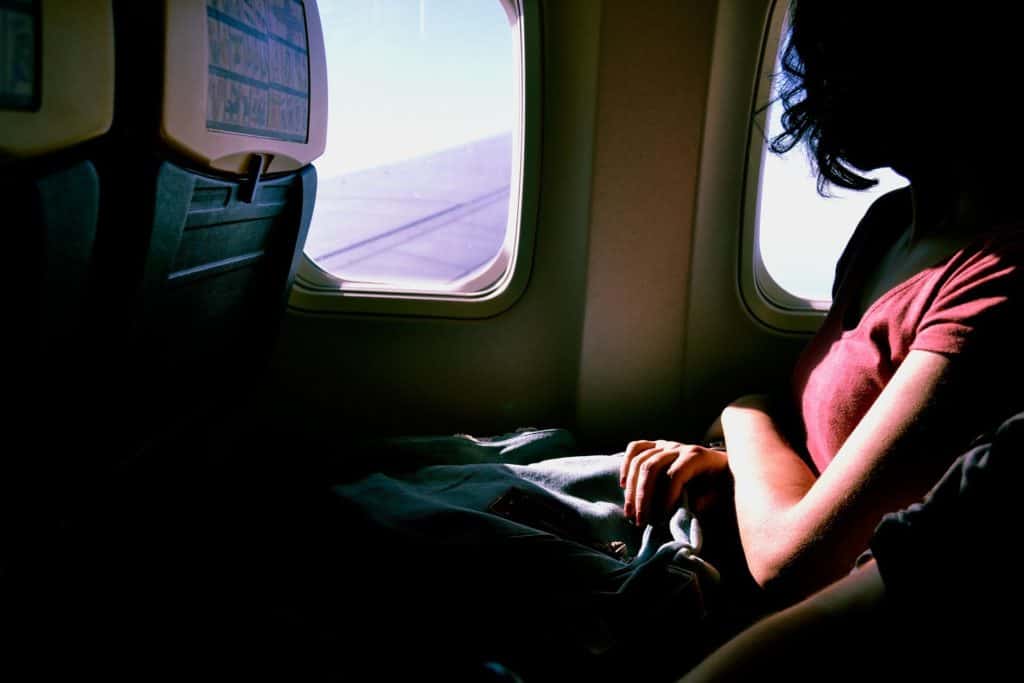
The first, and most efficient, is to save up air miles and pay for the upgrade with the miles you’ve collected. The general rule for most airlines is that you use your airline miles to upgrade one class from your original ticket. That means that you can upgrade to premium economy with an economy ticket or upgrade to business class with a premium economy ticket.
For more information on how to upgrade using air miles, just google “[Airline name] upgrade with miles”, as the rules are different for each airline.
You could also just pay for an upgrade if you feel like it’s worth it. In other words, if the value you attach to upgrading from economy to premium economy is greater than the price you’re paying for the upgrade, you should do it.
Many major airlines use a platform called Plusgrade that allows passengers to bid for an upgrade. It’s essentially like a blind auction, where you don’t know how many other people are bidding for the same thing and you have no idea how much they’re willing to fork over for that same upgrade. Keep in mind that there are many terms and conditions for auctions like these, so it’s a good idea to read up on your specific airline before participating.
If your flying time is flexible, you might want to consider volunteering to take a later flight.
Since airlines nowadays regularly overbook flights to compensate for empty seats left by passengers who don’t show up, you might be bumped from a flight.
What this means is that the airline will look for volunteers to take a later flight. At first sight, this might seem like a bad deal, but once you learn that it comes with advantages like lounge access, upgrades and flight vouchers. In the United States, new Department of Transportation rules state that airlines need to pay passengers that were involuntarily bumped up to $1,300.
Still think being bumped off a flight is such a bad thing?
As a budget traveller, you might think cheaper is always better. Well, I’m here to tell you – drumroll – it’s not. Finding cheap transport is fun and can be very useful, but sometimes it’s better to spend a little more money for a better flight.
Although you might pay a bit more for a flight with better hours, you’ll save time. No, you won’t have a shorter flight, but what you will do is spend less time recuperating from your long-haul flight. This means that you’ll have more time on the ground to deal with jet lag.
Have you ever been on a long-haul flight? What was your experience like? How many of these tips did you use?
Thanks for reading!
-S
PIN IT!


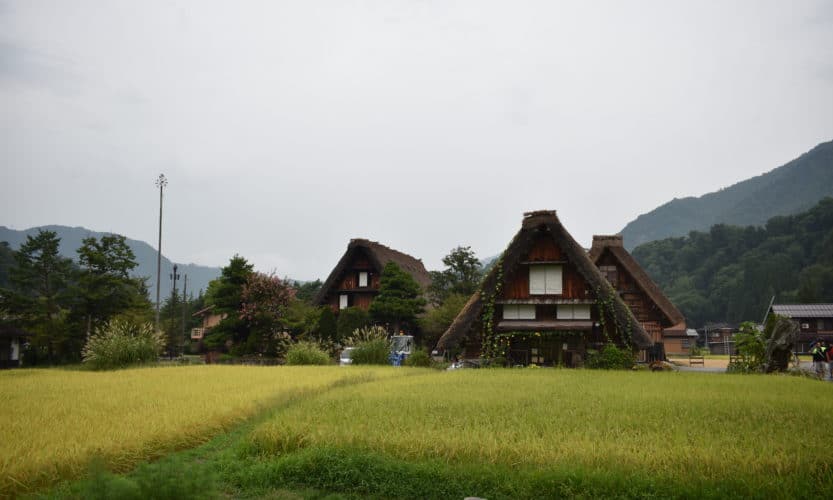
Japan tends to be seen as a daunting country that is filled with megacities where millions of people live. During your visit to Japan, you might want to leave those energetic cities behind for just a day and escape into the countryside. If that’s the case, the mountain village called Shirakawa-go is the perfect day trip destination for you.
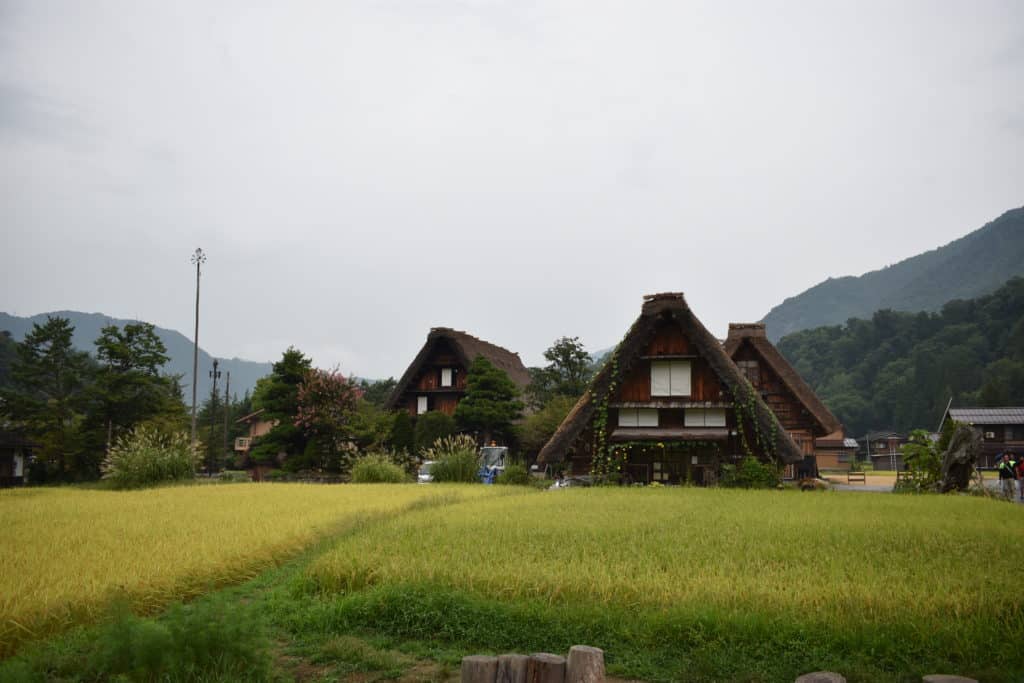
Shirakawa-go is a historical mountain village located within the city of Shirakawa, in central Japan (Gifu Prefecture). The village is mostly known for its traditional farmhouses with thatched roofs, constructed in the gasshō style.
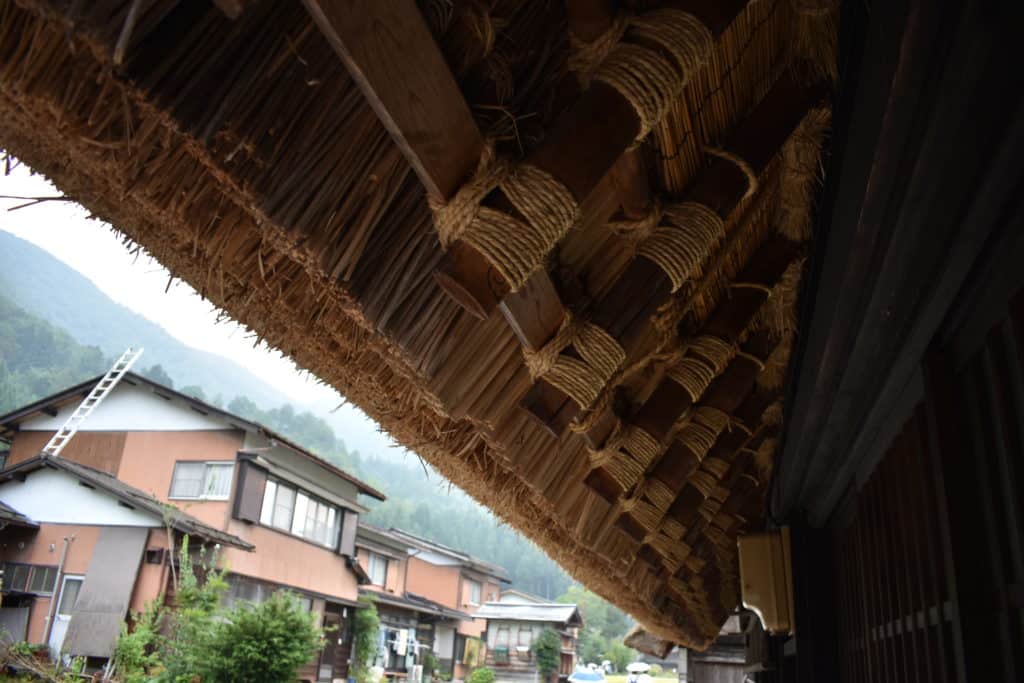
Shirakawa-go, just like its neighbouring village Gokayama, heavily depends on seasonal tourism for its income. The villages are located in a remote valley, surrounded by rugged mountains. This valley is known for its heavy snowfall in the winter months. Both villages became UNESCO World Heritage sites in 1995.
Yes, you could rent a car and drive to Shirakawa from wherever you are staying. However, car rentals in Japan tend to be more expensive than elsewhere (and much more expensive than using public transport) and they’re a huge pain when you’re travelling in and around big cities. And I’m not even going to mention finding a parking spot.
If you can, avoid renting a car and take public transport instead. It’s usually a hell of a lot cheaper, it’s easier and it’s better for the environment.
Crossing long distances by public transport in Japan is not that difficult, once you get an idea of how it all works. First off, I highly recommend you get a JR Pass. This pass is only available to foreigners visiting Japan and it covers all JR trains and some extras like a ferry to Itsukushima. It might seem expensive at first, but it’ll still be cheaper than paying every train individually if you’re staying for at least a week. Yes, the trains in Japan really are that expensive.
You might still be confused as to how to interpret the train system in Japan, but it’s pretty easy to get the hang of. Just click the link and read the information about trains in Japan (the page says Osaka, but it’s the same throughout the country).
One of the closest major cities to Shirakawa-go is Kanazawa, which means it’s the perfect basis for a day trip.
Take the Hokutetsu Bus from bus stop 2 at the bus terminal of Kanazawa Station (East Gate) bound for Shirakawa-go. The bus ride will take about 1 hour and 20 minutes. A one-way ticket costs 1,850 yen (about €14.50 / £13 / $16.50) for adults and a return ticket costs 3,290 yen (about €25.50 / £23 / $29). Tickets can be booked at the Kanazawa Station Transport Information Center.
From JR Toyama Station, take the Nohi / Hokutetsu / Toyama Chiho Tetsudo Bus bound for Shirakawa-go. The bus ride will take about 1 hour and 30 minutes. A one-way ticket costs 1,700 yen (about €13 / £12 / $15) for adults and a return ticket costs 3,060 yen (about €24 / £21 / $27). You can make online seat reservations.
From Nagoya Meitetsu Bus Center, take the Gifu Bus bound for Shirakawa-go. The bus ride will take just under 3 hours. A one-way ticket costs 3,900 yen (about €30 / £27 / $34.50). You can make online seat reservations.
Take the JR Thunderbird limited express train from Osaka Station to Kanazawa Station. In Kanazawa, transfer to the Nohi / Hokutetsu Bus bound for Shirakawa-go. The whole trip will take about 4 hours. A one-way ticket, assuming you have a JR Pass to cover the cost of the Shinkansen, costs 1,850 yen (about €14.50 / £13 / $16.50) for adults and a return ticket costs 3,290 yen (about €25.50 / £23 / $29).
For travellers coming from Kyoto: take the JR Thunderbird limited express train from Kyoto Station to Kanazawa Station, and then transfer to the same bus mentioned above.
Since the travel time from Kyoto and Osaka to Shirakawa is so long, you might want to consider staying in Kanazawa for a night to make the whole experience a bit more pleasant and make your schedule less packed. You might also want to reconsider a day trip to Shirakawa altogether if you don’t think you’ll be able to deal with this.
From Tokyo Station, take the Hokuriku Shinkansen bound for Kanazawa and get off at Toyama Station. There, transfer to the Nohi / Hokutetsu / Toyama Chiho Tetsudo Bus bound for Shirakawa-go. The whole trip will take about 3 hours and 30 minutes. A one-way ticket, assuming you have a JR Pass to cover the cost of the Shinkansen, costs 1,700 yen (about €13 / £12 / $15) for adults and a return ticket costs 3,060 yen (about €24 / £21 / $27). You can make online seat reservations.
Again, you might want to consider staying in Kanazawa or not doing this day trip from Tokyo because of the long travel time.
Since the village itself isn’t very big, the most logical way to get around Shirakawa-go is on foot. Besides, walking through this town will be the best way to experience what it really stands for.
Other than walking around the quaint streets, there’s also a vantage point up one of the mountains. You can walk all the way up there through a walking trail through the forest (caution: this trail is closed in heavy snow), but we saved some time – and energy – by taking the bus up to the viewpoint.
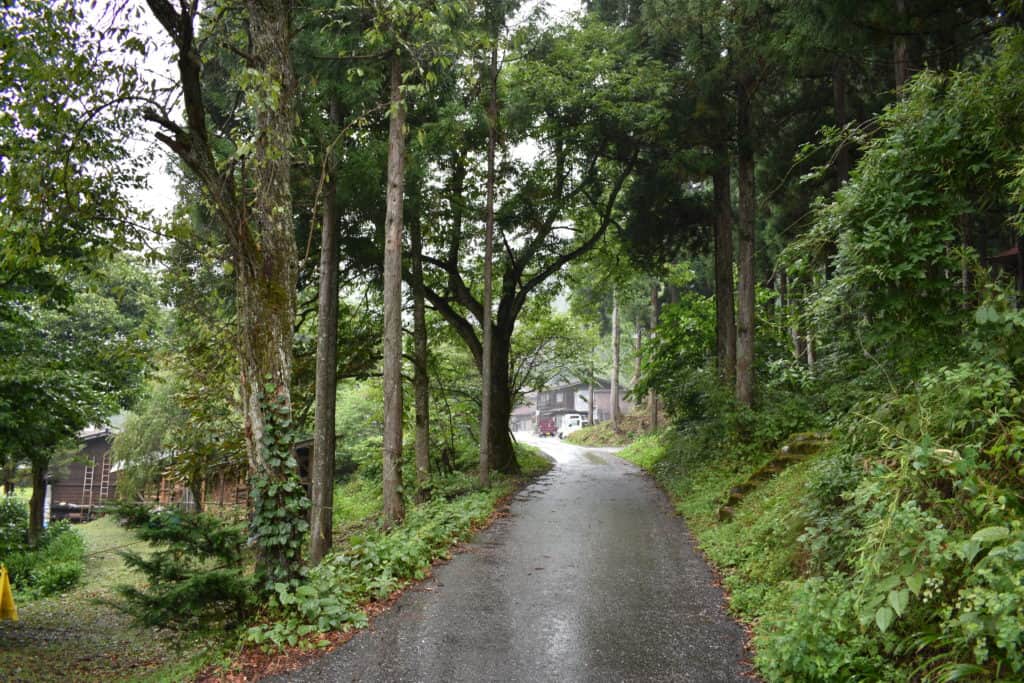
The bus stop for the shuttle bus is located right in the middle of the village, on the main road (which is closed to traffic between 9 am and 4 pm every day. It’s very easy to find the shuttle bus. A return trip will set you back 200 yen and the bus runs 3 times every hour.
Do you want to be transported back in time? Go to Shirakawa. Have you ever wondered what traditional Japanese architecture looks like? Go to Shirakawa. Do you want to hear the birds sing and see the snow fall in a quaint mountain village? You guessed it: go to Shirakawa.
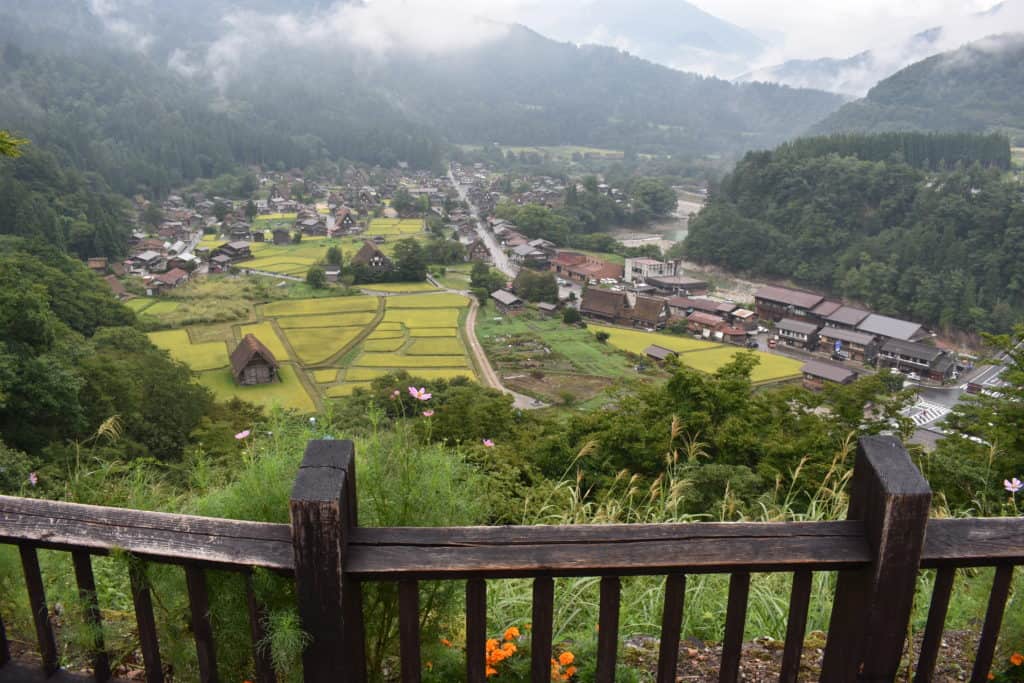
Here are some things that make the day trip to Shirakawa-go worth it:
As I mentioned above, it’s very easy to get to the observation deck where you can get a magnificent view of the village and the river that runs through it. It’s more than worth it, even if it’s just for the Instagram pictures.
Shirakawa-go is one of those destinations that can be visited at literally any time, depending on your personal preferences. Here’s a quick useful overview of what happens when and when you should plan your visit to Shirakawa.
The village lights up in the winter, which leads to gorgeous views. It’s arguably the most popular season to visit Shirakawa-go, but that also means that there are more tourists among you.
Recently, the popularity of this light-up event has even caused the city to limit the number of visitors they allow into the village to still be able to ensure a pleasant experience for everyone.
By the way: the reason why the huts and houses in Shirakawa-go are constructed with steep thatched roofs is because that construction is able to handle large amounts of snow, which the valley is known for.
Let me paint you a quick word picture. The thatched roofs of a mountain-surrounded valley village and cherry blossom trees. That’s it. That’s the whole picture. Because it’s all the reason you need to visit Shirakawa-go during spring.
While summer is probably the least popular season for this tourist attraction, it also means that there won’t be as many other tourists there with you.
But still, it can be very impressive to visit the village under a clear summer sky, with all the flowers and trees around the village in full bloom. Also, it’ll be easier to take pictures of the picturesque scenery with this summer lighting.
One of the best places to really experience what autumn is like in Japan is without a doubt Shirakawa-go. In the village, you can marvel at all the maple trees in full glory with their reddish brown autumn coloured leaves.
I won’t even have to convince you with any more words after you check out these pictures by Stewie Overseas.
We visited Shirakawa-go just before the autumn, but the weather was more than autumn-ish. It was cold and it was raining, but the village was still enchanting AF.
Have you ever been to Shirakawa-go? What did you think of it? If you haven’t been there, which season would you prefer? Let me know in a comment! I’d love to hear from you.
Thanks for reading!
-S
PIN IT!


The first stop of our big Japan trip this summer was Osaka. With its population of nearly 2.8 million people and its reputation as one of the biggest foodie cities in Japan, it’s no surprise that it’s such a popular tourist destination. This is how we spent five days in and around Osaka.
Disclaimer: if you’re going to Osaka and you’re looking for a five-day itinerary, you might not be able to fully follow this one. It includes three day trips and some events that aren’t freely accessible to everyone. It should, however, get you a pretty good idea of the main things you need to do.
Click one of the links below if you’re only interested in a specific part of this itinerary!
Day 2: Dotonbori (Osaka) & Bon Odori Festival
Day 4: Hiroshima & Miyajima day trip
You can also check out the map below for every specific location mentioned in this blog post.
Our flight from Brussels Airport departed at 10 am. We had one short layover in Frankfurt, where we arrived at 11:15 am. After another flight – my first ever long-haul flight, by the way – we arrived in Osaka at 8 am.
Before you ask: yes, I felt jet-lagged, but it wasn’t nearly as bad as I had expected.
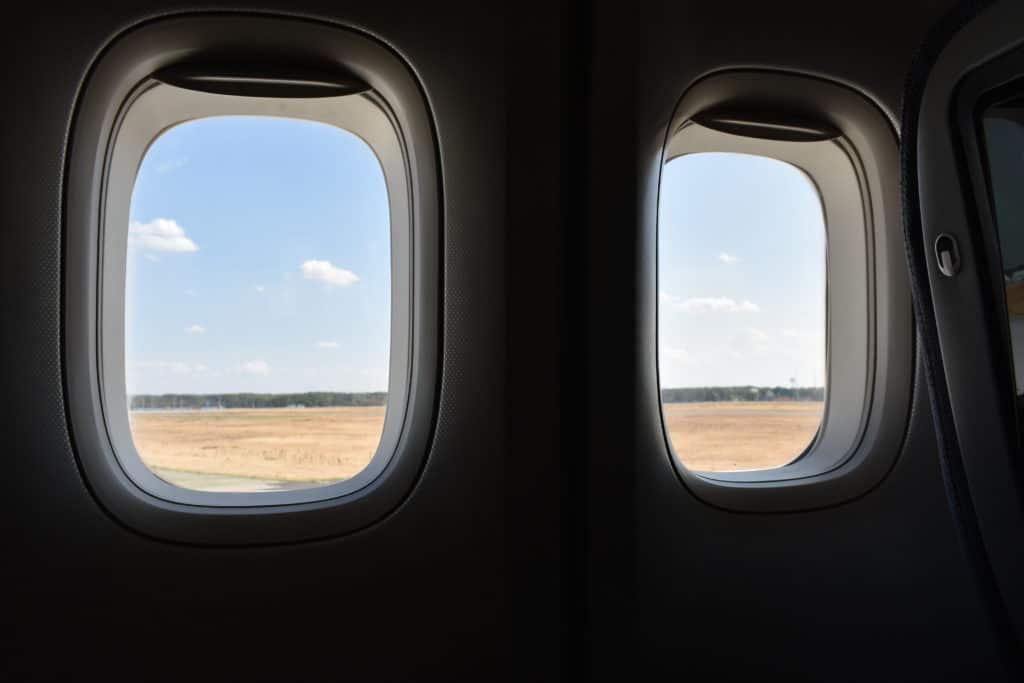
After my dad picked up the mobile WiFi device he had ordered beforehand, we boarded a bus that took us to one of the main bus stations of Osaka. From there, we had a short (but exhausting) walk ahead of us.
I assure you, I’d rather walk for an hour in decent conditions than do that fifteen-minute walk again. Just saying.
We eventually made it to our Airbnb around 1 pm, but we weren’t officially allowed inside until 3. Luckily, a lady was cleaning the apartment and let us in to drop our bags before we set out to explore the city.
New to Airbnb? Get $35/€30 off your first booking through this link!
One of the first things we saw (mainly because it was right around the corner from where we were staying) was an indoor shopping arcade called Tenjinbashi-suji. Of course, we had no idea what it was called at the time, but I found out afterwards.
This arcade featured quaint side streets, boutique shops, small cafés and pachinko and slot machine establishments.
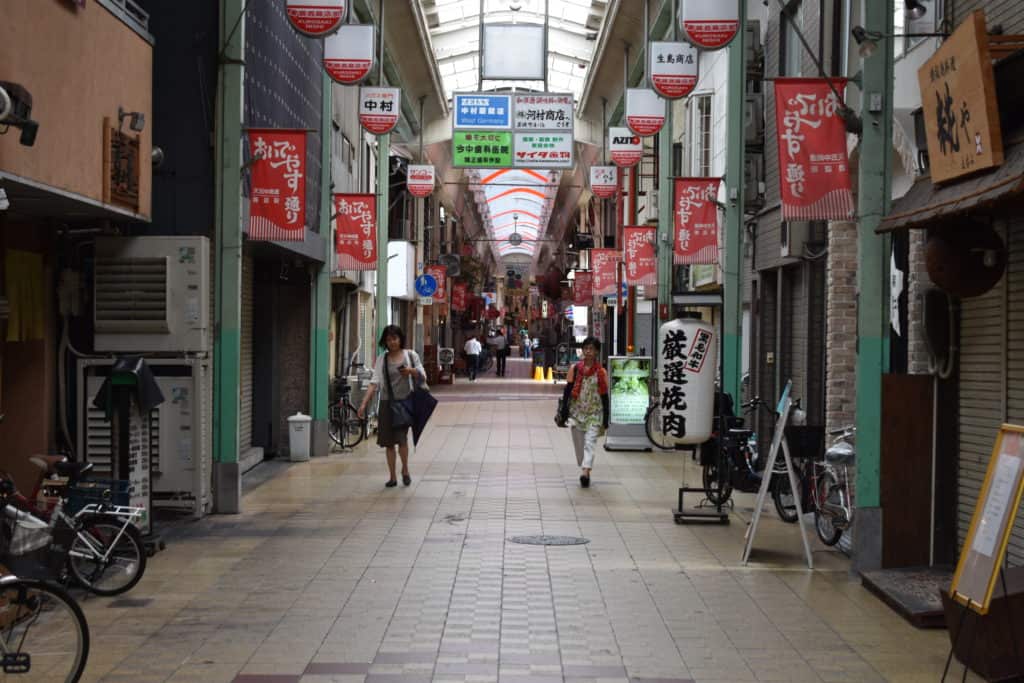
Fun fact about pachinko: it’s the Japanese response to western slot machines and a nifty way around the government’s ban on gambling for cash. Also, the pachinko market in Japan generates more gambling revenue than Las Vegas, Macau and Singapore combined. Madness.
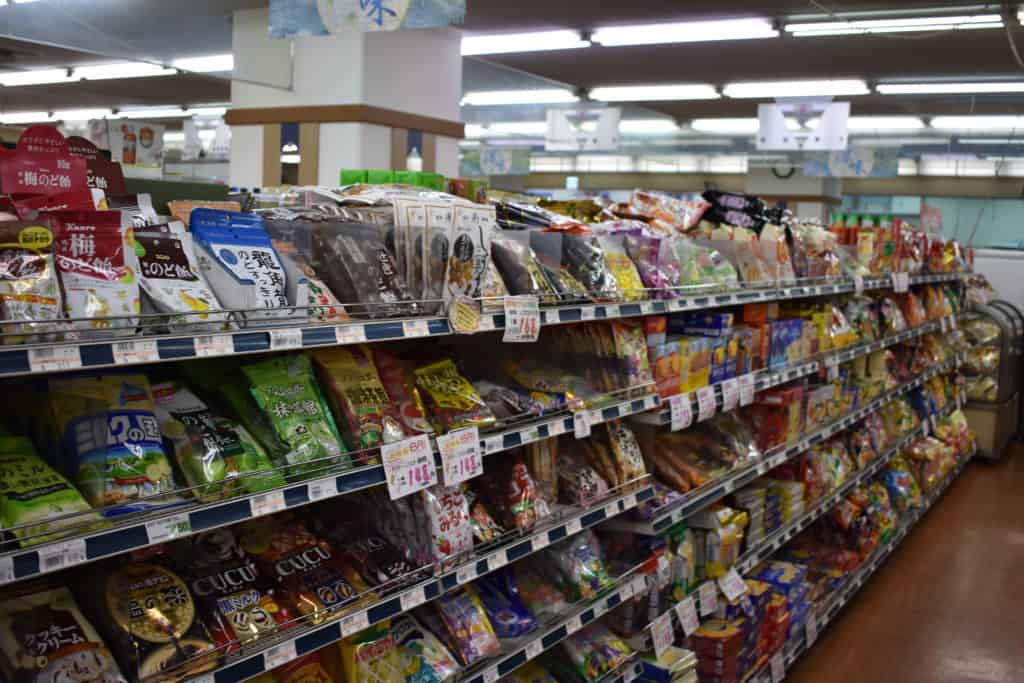
Anyway. Around 3 pm, we decided to try to find unique flavours of candy in a convenience store near our Airbnb. As in most convenience stores around the world, I assume, there was an entire section dedicated to candy and cookies. However, the exciting part in Osaka is that – assuming you don’t speak Japanese – you have nothing to go off except the illustrations on the packaging.
We picked up some candy and sweets and headed back to the Airbnb to dump our stuff and freshen up before heading back to the city.
After spending some time at the apartment to unwind, we went back to the city to explore some more. We found a business card at our Airbnb promoting a nearby coffee shop called Haiku Coffee, so we decided to go there.
I wasn’t able to find a website, but they do have a Facebook page and you can find their contact information by just Googling “Haiku Coffee Osaka” (or just click this link).
When we entered the coffee bar we saw that there was only one big table in the middle of the establishment and we were the only guests. The waiter was very kind and tried his very best to tell us some stories in English. The coffee was freshly made and tasted great.
Now that we got our coffee fix, we walked around some more and really took in the atmosphere of Osaka.
My parents then went back to the apartment and my sister and I set out to take some pictures to keep our Instagram followers happy. Afterwards, we went back to the apartment as well and then we all went out for dinner together.
Earlier, as we were walking through Tenjinbashi-suji, we had noticed a small restaurant on one of the corners. It looked very secretive and it was hidden away behind bamboo sliding doors.
The first time we walked past, the doors were open and there was a man (we would later find out he was one of the cooks) standing outside. My dad asked him if we could make a reservation for that night, and so we did.
Fast forward to 7 pm, when we had our first Japanese dinner experience.
As soon as we sat down at our table and got our menu, we realised that the chef didn’t speak any English. And neither did any of the waiters or other kitchen staff. On top of that, there are no pictures on the menu at all, so we have to resort to using Google Translate to let the chef know he can “surprise us” with anything. And he did.
The Japanese businessmen sitting at the bar, talking to the staff, were seemingly very amused at our struggle to order food.
We ended up getting an assortment of mostly raw fish, pickled vegetables and other foods that didn’t have the structure they were supposed to have. All in all, not a bad meal, but not the best.
One advantage of this experience is that I can now say I’ve had dinner in Japan where I mostly had no clue what I was eating. Two years ago, that would have been my worst nightmare. I’m definitely adding that to my mental ‘crazy travel experiences’ list.
On day two, we had our first experience with the Japanese public transport system called Japan Rail. It was a very welcome change to the public transport system in Belgium, where trains and buses often run late or they don’t even arrive at all.
In Japan, everything is very well organised. Trains mostly come on time, and if they are delayed, that information is spread efficiently and quickly.
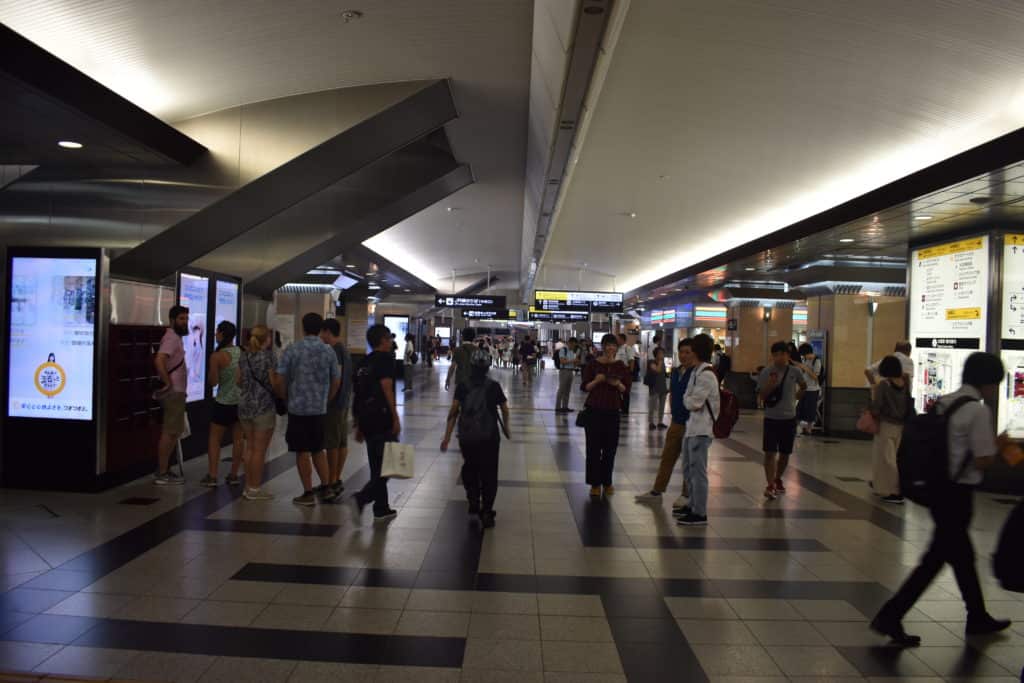
Although our experience with this Japanese system was very pleasant, it was still quite confusing. In order to make it easier for you to take the train in Osaka, here’s a concise guide.
There are five categories of trains in Japan:
With the exception of the last category (Shinkansen trains), most JR lines offer all categories of trains. For example, if you’re going from Tokyo Station to Shinjuku Station, you can take a local train, a rapid train, an express train or a limited express train. This is one of the main reasons why you’ll probably never have to wait for a train for longer than ten minutes in Japan.
Information about Japanese trains is displayed both in Japanese and in English on information boards in the train stations, so you should have no problem locating your train.
As I covered in “Things You Should Know Before Visiting Japan“, I highly recommend that you get a JR Pass if you’re staying in Japan for seven days or more. You’ll probably be travelling around quite a bit, which means that train fares will definitely add up if you don’t have a JR Pass. It’s also important to know that you can’t buy a JR Pass in Japan, but you have to order it online before going to Japan.
We had breakfast in the train station.
I know, it doesn’t sound glamorous at all, but it was actually very tasty. We found a small food store – I don’t want to call it a bakery because they weren’t, you know, baking anything – in the station. Everything looked delicious and the smells reminded me of going to a bakery on Sunday morning and immediately smelling the fresh buns that just came out of the oven.
We bought some fresh croissants and a whole assortment of other buns. While we were deciding which buns were going to give us a sugar rush that morning, my dad had gone to Starbucks to pick up some coffee to go with our breakfast.
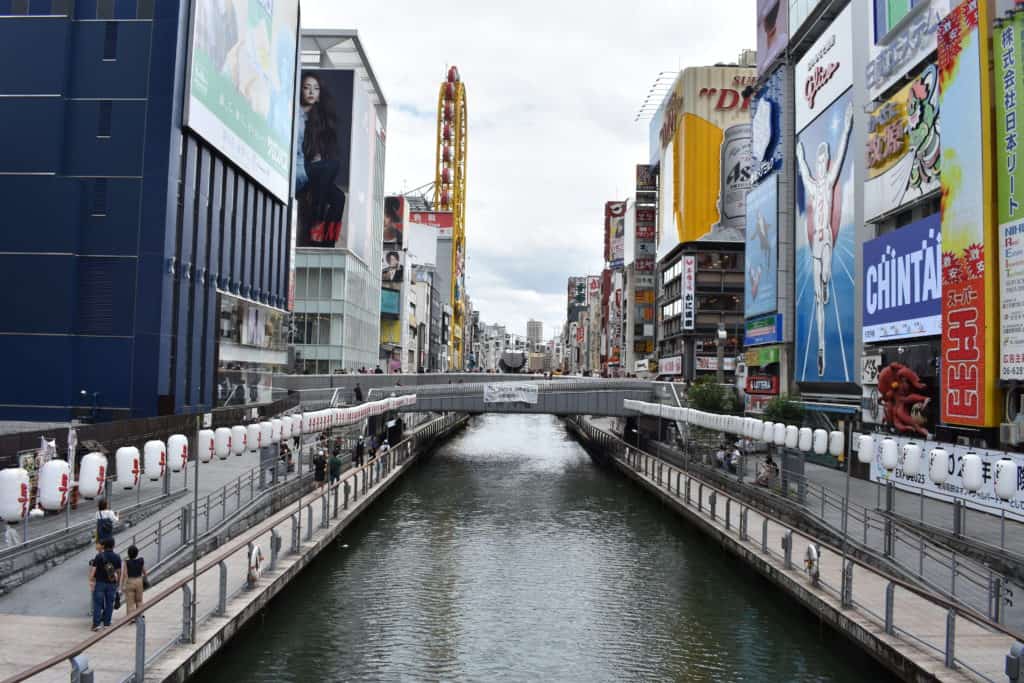
When I tell you that no Osaka itinerary would be complete without including Namba and Dotonbori, I’m not just exaggerating. You really do have to see the neon signs, the flocks of people and the flashing advertisement panels for yourself.
However, chances are that you have no idea what I’m talking about. In that case, allow me to introduce you to the pinnacle of modern Japanese culture.
Namba is one of the districts of Osaka’s Chūō ward, located very centrally within the city. Among locals, it’s known as one of the major entertainment districts of the city, as it’s home to many of Osaka’s most popular restaurants, bars, clubs and arcades.
Within Namba, the Dotonbori area is one of Japan’s major tourist attractions. So yes, there will be many tourists if you’re travelling during high season, but I strongly believe that it’s worth the visit and that the tourists even add to the experience.
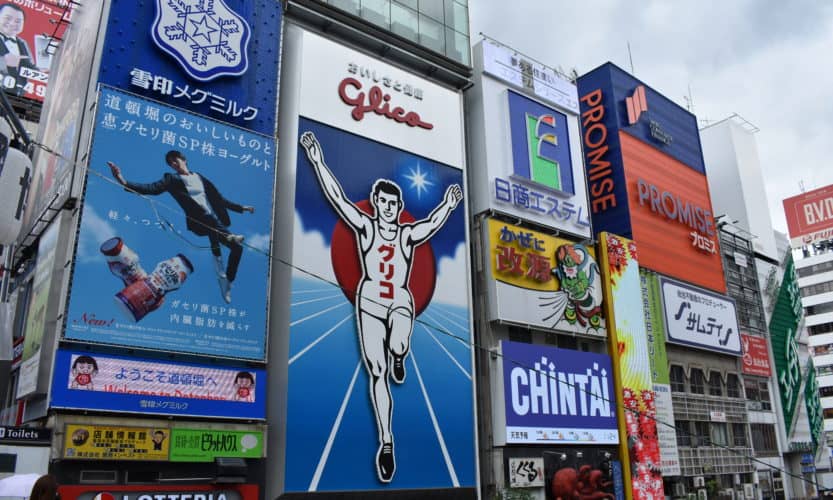
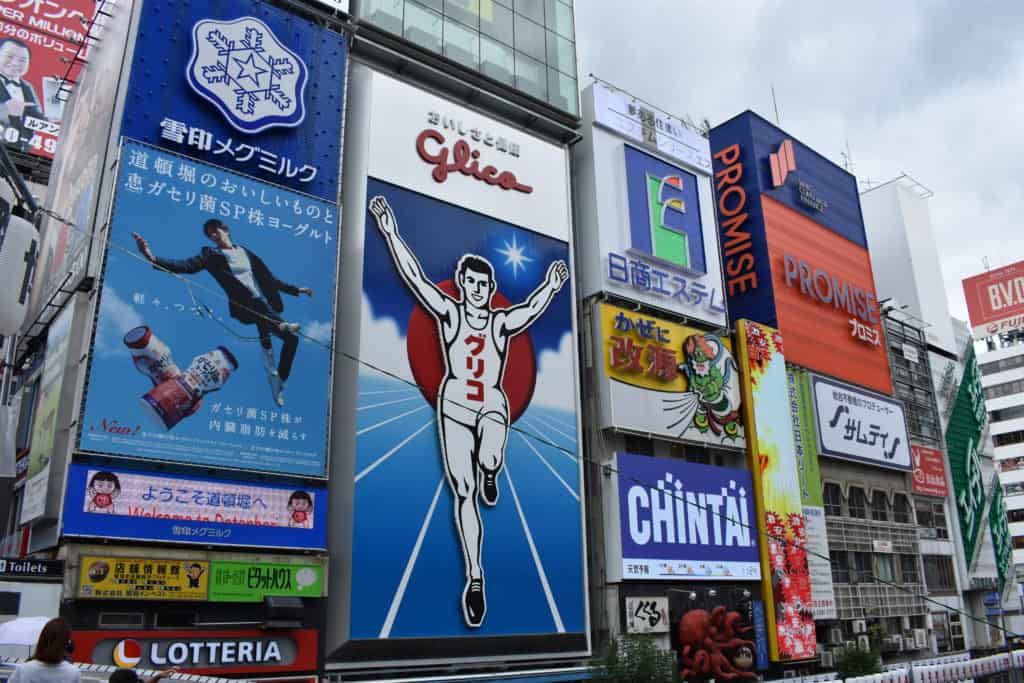
You might have heard of the Glico Man. Well, you guessed it: you can find the Glico Man sign in Dotonbori. It’s the only sign in the area that hasn’t been changed since its original installation in 1935. The sign depicts an athlete on a blue track, who is meant to convince the world of the power of Glico candy.
After spending the morning in awe of the busy streets of Namba and Dotonbori, we decided it was about time to get lunch.
Looking back on it now, this meal was probably one of the most wholesome, most impromptu decisions we made during our two weeks in Japan.
As you’ll soon come to learn, all major cities in Japan are filled to the brim with department stores. Some of the biggest and most famous chains are Loft, Mitsukoshi, Daimaru and Hankyu. These department stores usually have a basement floor (sometimes even two entire floors) that is entirely dedicated to food. They’re like big indoor food courts that still remind you of outdoor food markets when you’re walking through them.
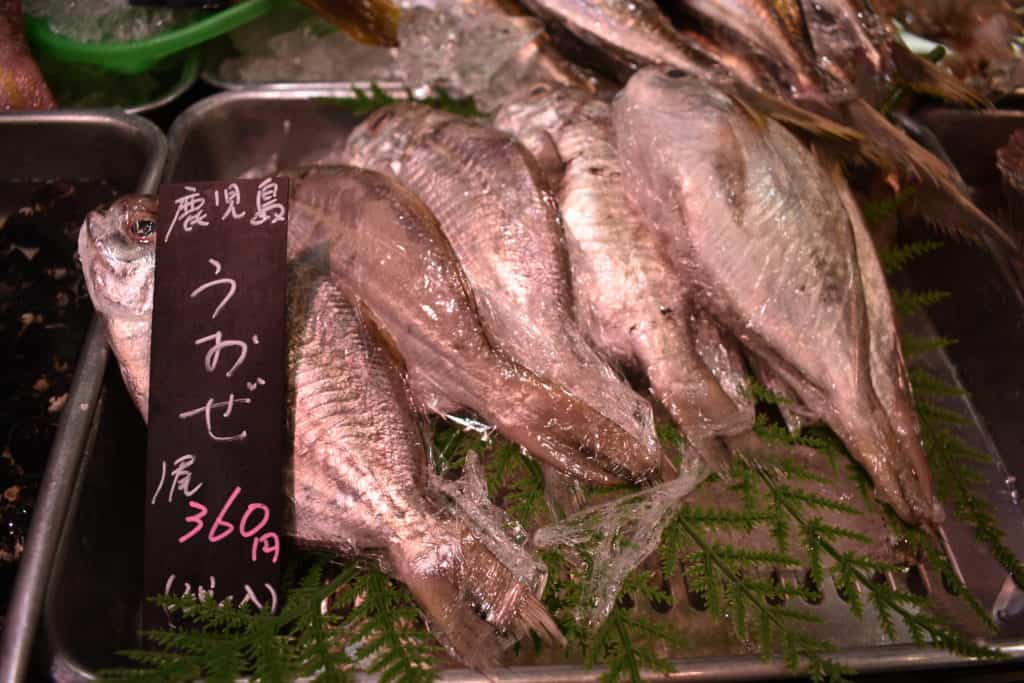
We went to one of the department stores in Osaka and we bought sushi, vegetable salads and raw meat. We took our bag, which was filled to the brim with delicious Japanese food, and we took the elevator up to the 14th floor, where we found a lunch garden rooftop terrace that was mostly empty.
And so, we sat down on the ground, opened up our boxes and we had lunch overlooking the Osaka skyline. Let me tell you: the food was great, the view was better and my company was the best.
Side note: I also got a kick-ass clip for my first Japan travel video! (The one right after the beat drops where my sister and I jump in the air, 1:47 in the video)
All stuffed up from lunch, we took the elevator back to the ground floor and returned to Namba. I filmed some footage for the travel video and we spent some time trying to find the perfect spot for the ‘Gram. After that, we returned to the Airbnb to freshen up before the big event of that day: the Bon Odori Festival.
Now, if you’re reading this blog post to get an idea of what you can do during your stay in Osaka, it’s very unlikely that you’ll be able to follow along for this part. My apologies for that.
At this point, I’m about 90% sure that you’re thinking “But Sander, what is a Bon Odori Festival?”. To explain that, we have to go back to the meaning of Bon (or Obon).
Obon is an annual Buddhist event to commemorate one’s ancestors and honour their spirits. A Bon Odori Festival, literally translated as “Bon Dance Festival”, is an event that is entirely based around Obon. There are food stands where you can hear yakitori sizzling on the fire, stalls where you smell the garlic from fresh gyoza and many other food and drink related stands.
If you ever get lucky enough to experience Bon Odori Festival for yourself, I highly recommend you locate a food truck that sells kakigori. This is essentially just shaved ice and coloured syrup in a cup, but it’s so much fun to eat and it actually tastes like something other than ice. The main reason I like kakigori so much is probably that it reminds me of the kakigori I ate at the company Bon Odori Festival back in Belgium when I was a kid.
Other than the whole food truck situation, there’s usually a big square stage in the middle of the festival grounds. On this stage, people are singing and dancing, and when the time comes for the Bon Odori, people form circles around the stage and start dancing themselves. If you can’t imagine anything that looks like this, I put a short fragment of it in the video.
My dad works at a Japanese company. He has travelled to Japan for work a lot over the past few years, and when we decided to go to Japan on holiday, he quickly found out that there would be a Bon Odori Festival organised by the company on our second day there.
Side note: companies aren’t usually the ones who organise these festivals. The company my dad works at does it every year and they make the new employees help in the organisation. Also, new employees are responsible for the entertainment, which means that they were dancing on the stage for the majority of the night. You can also see this in my travel video (and it’s one of my favourite shots in there!)

Once we realised that we were going to this festival, my dad arranged for us to get traditional Japanese clothing so that we wouldn’t stand out against all the Japanese people in our regular jeans and t-shirt. This festival was surreal to experience as a westerner and I’m very thankful to my dad for giving us this opportunity.
On day three, it’s about time for you to get out of the city and take a day trip to Nara. Again, no Osaka itinerary would be complete without mentioning the beautiful city of Nara, which was Japan’s first capital city back in the eighth century.
Music tip: listen to Arrival in Nara by alt-J while planning this day trip. It’s ridiculously good.
The main thing Nara is famous for is the deer which roam around freely through the crowds of awe-struck tourists. You might have heard that they walk around the city, but that’s not true. The deer mostly stay within Nara Park. Not to worry, though: this is still an enormous park and you won’t even be able to see all of it.
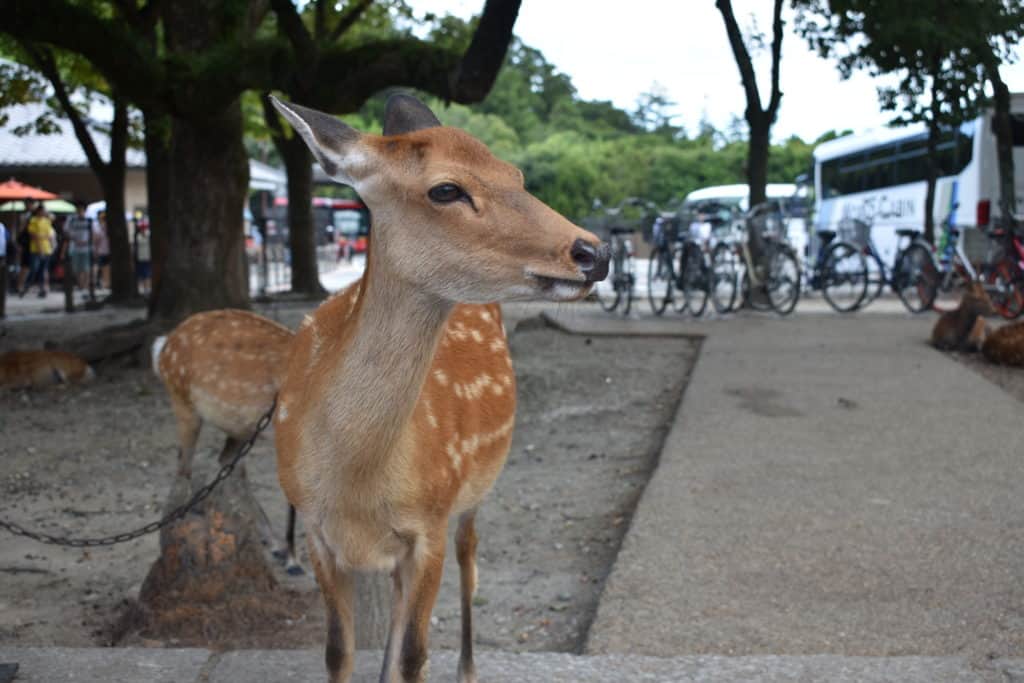
At the entrance of the park, you might feel like you’ve made a terrible mistake and you’ve fallen for a tourist trap. That’s to say, there are a LOT of tourists here. But many of them don’t bother to wander deeper into the park after visiting the main temple, so you’ll probably have more deer to yourself if you do just that.
When we were in Nara, we had a local guiding us. As my dad works at a Japanese company, like I mentioned earlier, he used to have a boss who was born in Nara. This man’s name was Mr Egawa and he left the company a few years ago, but he gladly agreed to guide us around his hometown.
The first place you should visit after getting over the initial realisation that you’re sharing the pathway with thousands of wild deer is Todai-ji Temple. This temple is one of Japan’s most famous temples and it has great historic significance.
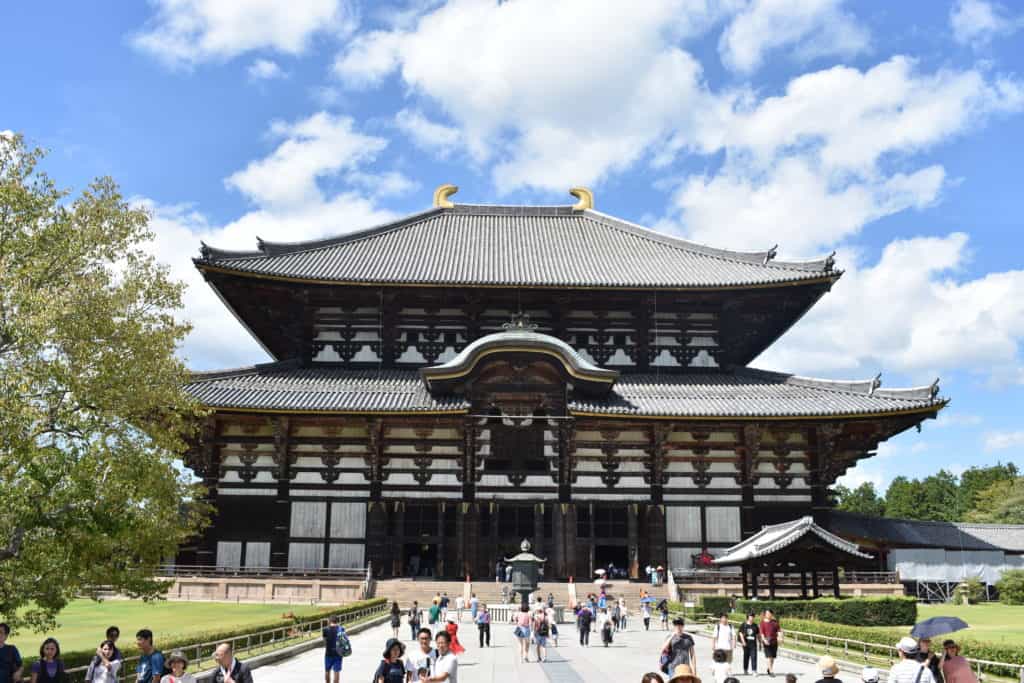
The name might not ring a bell, but what if I told you that this temple is home to one of the biggest Buddha statues of Japan? And what if I told you that the temple is the biggest wooden building in Japan? You’d deem it worth a visit, right?
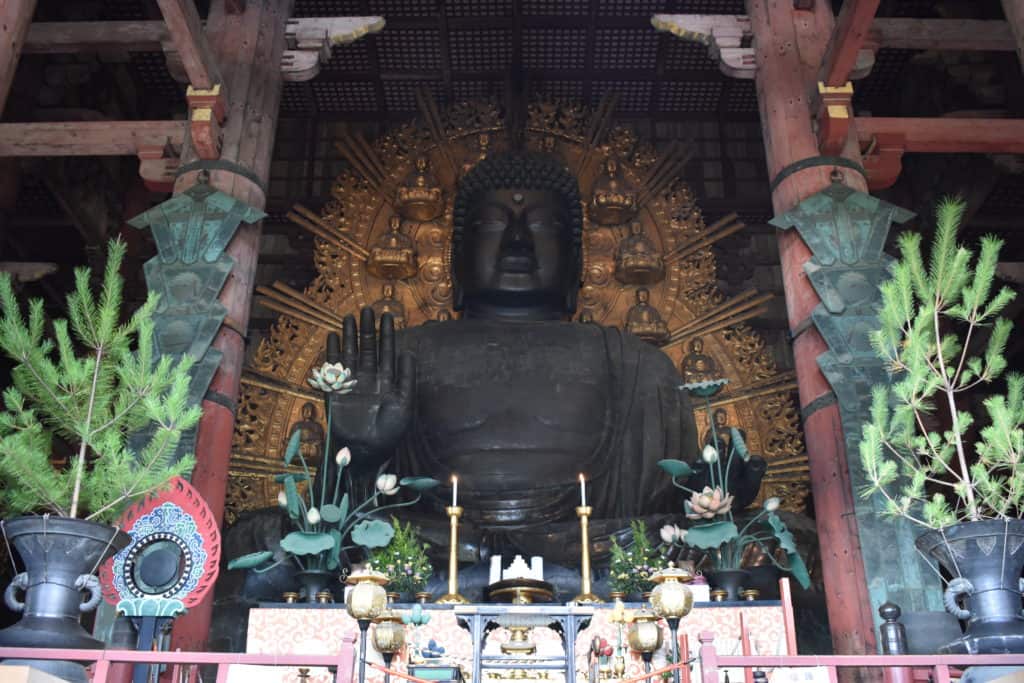
After gazing at the immense statue of Buddha and walking around the temple, cautious not to fall for any palm reading or fate prediction scams, you’re going to walk along the path for a little while until you get to Nigatsudo Hall.
So, you’ve seen the main attractions of Nara park and you want to get away from the tourists and still see some amazing things. I’ve got just what you need: Nigatsudo Hall.
This hall is located at a four-minute walk from Todaiji Temple (and it’s actually a part of the Todaiji Temple complex), so you’ll get there in no time. Many other travellers don’t take the time to visit this place, because they really only want to see the huge Buddha statue. While that’s fine, you wouldn’t be reading this post if that’s all you were interested in.
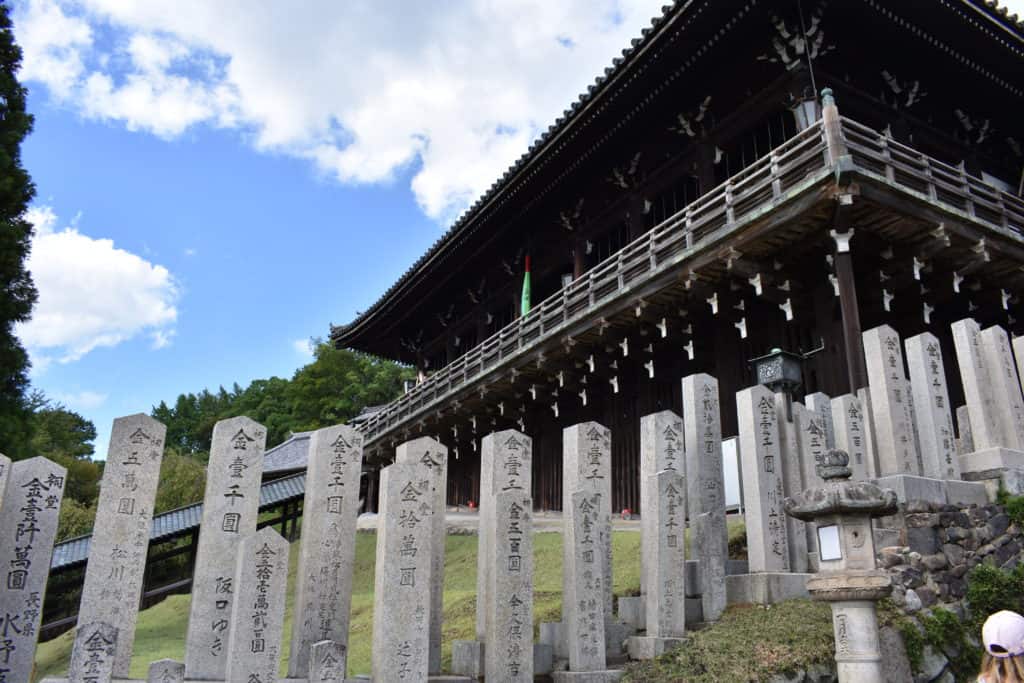
The pillars you can see in the picture above were constructed in honour and gratitude to people who made sizeable donations for the construction and upkeep of the temple complex. The smaller pillars were constructed for anyone who donated the equivalent of $1,000. Their big brothers can range anywhere from $1,000 to $100,000. Our Japanese friend told us that the symbols that are engraved in the stones are names of the families that donated.
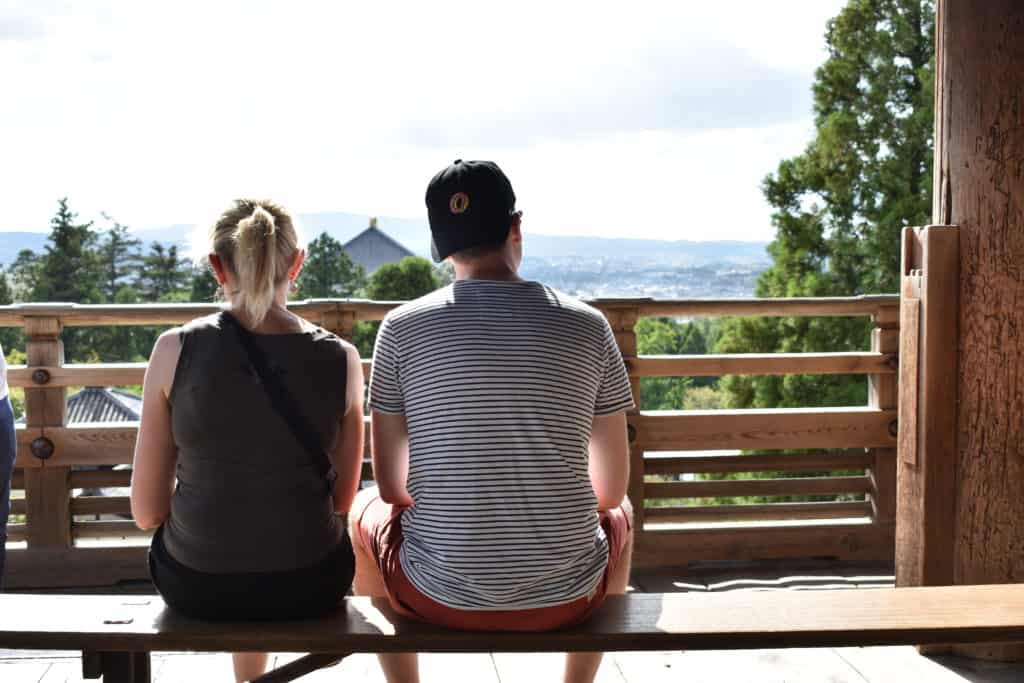
Bonus: if you do decide to go to this part of the temple complex, you’ll be able to take kick-ass pictures like the one above.
I also highly recommend that you wander around Nigatsudo Hall for a while. There are small paved pathways that make you feel like you’ve travelled back in time to imperial Japan, where you’re exploring an abandoned city.
Now it’s time to make your way to the other side of the park. By now, you’ve probably reached the late afternoon and you’ll want to rest somewhere idyllic. Boy, do I have the perfect location for you.
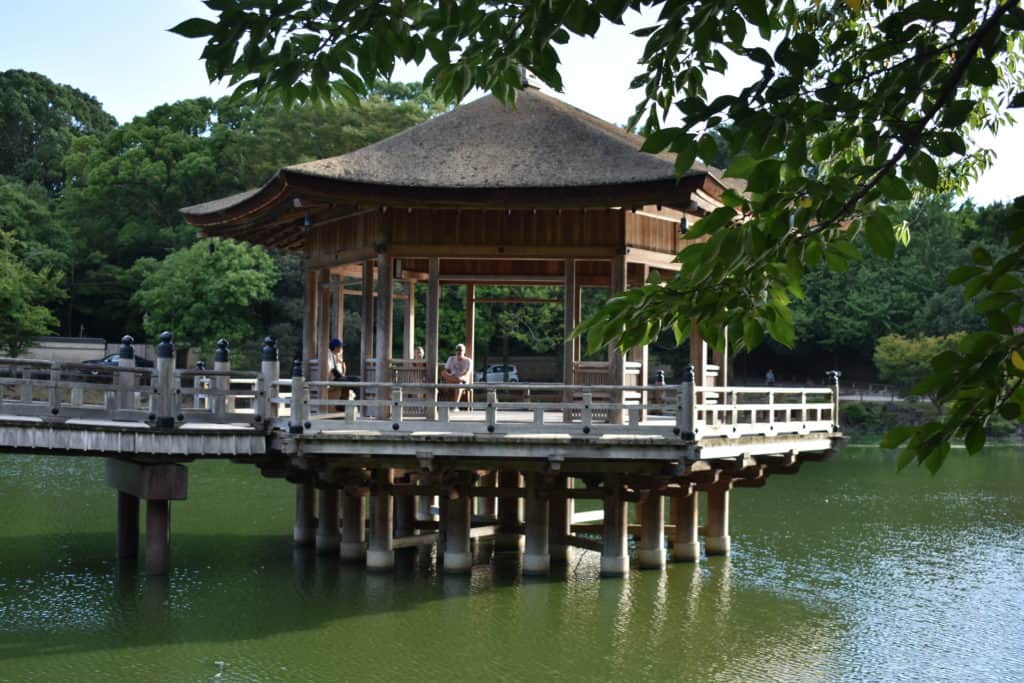
This little thing is called Ukimido Pavilion. It’s the perfect place to sit down for a while, catch a breath and listen to the sounds that nature produces. My sister and I also, you guessed it, walked around the pavilion in search of hidden Instagram spots. What do you know? We found them. I’ll let you discover them for yourself, though. Be sure to tag me on Instagram if you find them!
After discovering the fascinating hidden past of Japan, chilling with deer on a grass field and taking plenty of pictures, you’ll head back to the city of Nara for dinner.
We had a reservation at a restaurant just outside the city centre with Mr Egawa and his daughter Yuri. She spent a few years studying in Belgium (go figure!). As we were waiting for Yuri to arrive at the restaurant, we realised that it wouldn’t open until 6 pm. And that’s the story of how we ended up in a bar in Nara that used empty shopping carts as tables and empty barrels as chairs.
We all gulped down a refreshing drink and then made our way to the restaurant. The food was great, but I had the feeling that it was something like ‘Westernised Japanese food’. I’m not even sure whether or not that makes sense, but oh well.
After dinner, we really got to experience what it’s like to walk through Nara at night. Mr Egawa and Yuri took us to one of their favourite places in the city: a small lake that was located right in the city centre.
At that time of day, there were several lanterns that lighted up the area around the lake. People were unwinding and picnicking after a long day of working hard. The whole thing was kind of surreal: it was an extremely relaxing experience in a country that never seems to sleep.
Our fourth day in Osaka was another day trip. This time, we went to Itsukushima Shrine on Miyajima Island and Hiroshima. If you want to do the same, here’s how you should go about it.
First off, you’re going to want to take the Tokaido-Sanyo Shinkansen train from Shin-Osaka Station to Hiroshima Station. There you’ll transfer to the San-Yo JR Line bound for Miyajimaguchi Station.
Again, I can’t stress enough how much I recommend getting a JR Pass. Especially if you’re going to do as many day trips as we did. A JR Pass will significantly cut your transport expenses in Japan. For your reference, a return trip to Hiroshima would set you back about 20,000 yen (equivalent of about €170 / £150 / $190). A 14-day JR Pass that gives you unlimited trains and Shinkansen rides would cost 46,000 yen (€360 / £320 / $410).
Anyway. You’re in Miyajimaguchi Station now. From here, you can take the ferry to Miyajima Island, which is where you’ll find Itsukushima Shrine. This ferry is covered by your JR Pass, but be careful to go through the JR entrance when boarding the ferry.
Starting off with what is probably the main reason you’re interested in Miyajima: Itsukushima Shrine. The huge Torii gate that seemingly floats on the water at high tide. At low tide, it’s possible to walk all the way to the foot of the Torii gate and admire it from up close.
I know, it’s tough to schedule your visit based on the weather and the tides. But if you arrive at the island at low tide and you have some spare time in your itinerary, I suggest that you stay until the shrine is fully in the water.
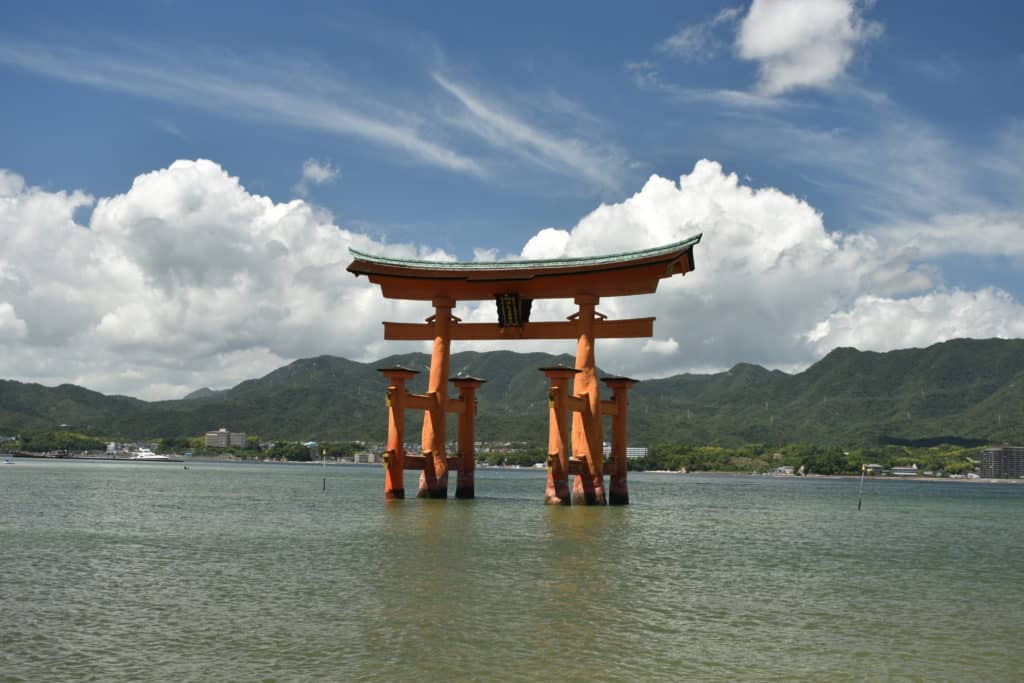
After spending some time marvelling at Itsukushima Shrine, you should make your way back to the ferry. On the way back, you’ll have a choice between a path along the water and a path that seems to go through some kind of village. Take the village route.
It’s definitely catered toward tourists, but it’s where you’ll find some deliciously prepared oysters. According to my dad, anyway. A bit further along the path, you’ll also find several food trucks that sell all kinds of grilled seafood. We tried the grilled octopus and it was delicious, although slightly chewy.
Now, for the second part of this day trip. It’s time to go to Hiroshima. Get back to Miyajimaguchi Station and take the San-Yo JR Line back to Hiroshima Station.
For anyone who has any historical knowledge, Hiroshima won’t be another intelligible Japanese name. It will be the city where the first atomic bomb fell in 1945. In the aftermath of the bomb, nicknamed Little Boy, over 100,000 civilians died. That’s why every major tourist attraction in the city has something to do with remembering the lives that were lost in that attack.
The two memorials we visited were the Atomic Bomb Dome and the Peace Memorial Park.

The Atomic Bomb Dome is the building where the bomb actually fell. This was the only building around the bomb’s hypocentre that was still standing after the bomb hit the city. It was registered as UNESCO World Heritage in 1996 as a symbol for peace.
The Peace Memorial Park is the main park of Hiroshima and it’s home to the A-Bomb Dome and various other memorial sites, museums and monuments. Nowadays, it’s a nice park to take a stroll in.
After spending a gloomy afternoon in Hiroshima, it’s time to take the Shinkansen back to the upbeat city of Osaka. More specifically, we’re going back to Namba, to check out what it looks like by night.
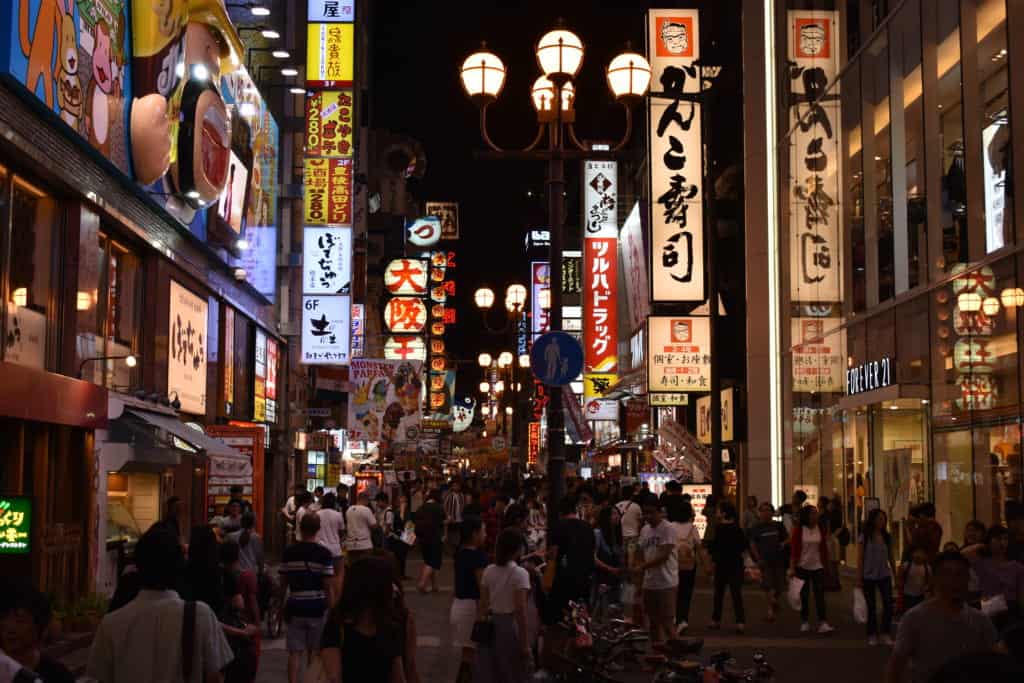
In our specific situation, my sister and my mom wanted to visit one of the clothing stores. My dad and I took that as an opportunity to bond over some cans of beer at the riverside. Three months later, that’s still one of my fondest memories of the whole trip.
When my sister and my mom came back from the store, we went to dinner. We opted for a small riverside restaurant that served tapas-like plates. It was a lot of fun and the food was delightful.
Yes, another day trip. Deal with it.
There are a few options that will take you from Osaka to Kyoto.
The fastest (and most expensive) option is the JR Shinkansen from Shin-Osaka Station to Kyoto Station. However, I don’t recommend this option if you don’t have a JR Pass. It’s only 9 minutes faster and it costs twice as much. If you do have a JR Pass, however, go right ahead.
The other option is to take the Kyoto JR Line from Osaka Station or Shin-Osaka Station to Kyoto Station. Preferably, you’ll want to take a Special Rapid train, which will only stop at Osaka, Shin-Osaka, Takatsuki and Kyoto.
The first thing you’ll probably want to visit is the infamous Arashiyama Bamboo Grove. You know, the forest with the tall bamboo trees. Starting from Kyoto Station, it takes one more train ride to get there. Take the San-In JR Line bound for Sonobe and get off at Saga-Arashiyama Station. From there, it’s only a short walk away.
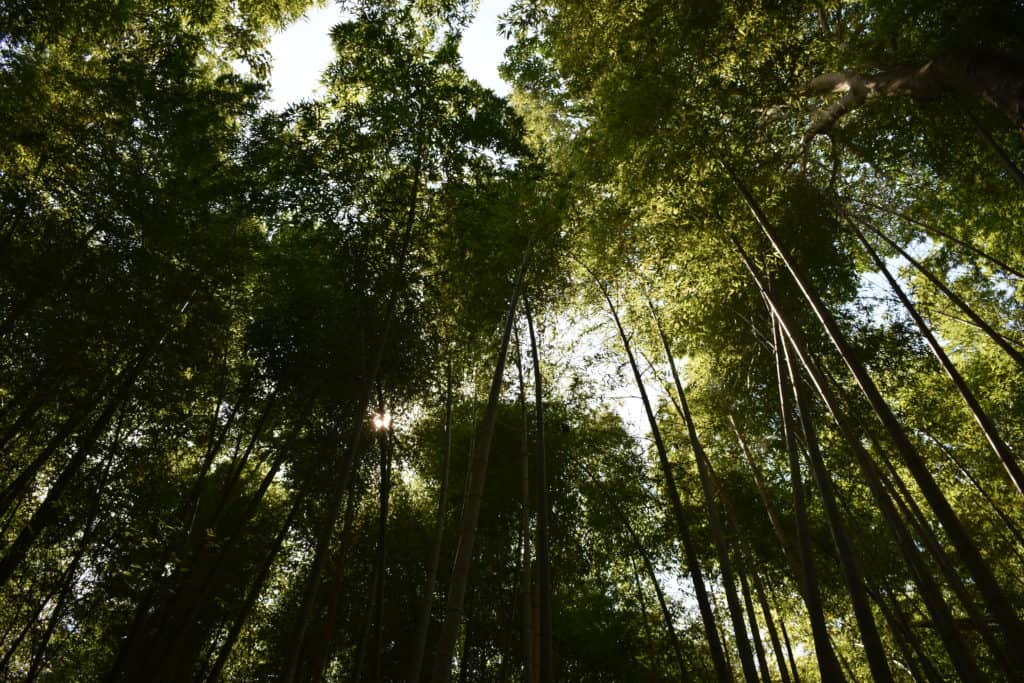
This forest is in a similar situation as Nara Park: it might seem like there are many tourists, but there are so many hidden corners (which are just as magnificent as the main pathway is) that you won’t have a problem finding them. Venturing off the beaten path has never been easier.
By the way, here’s a quick tip if you’re trying to get good pictures of yourself in the bamboo forest. Get the person who’s taking the picture to do it from a low perspective. That way, it’s much easier to make it seem like you’re the only person in the forest.
From Arashiyama Bamboo Grove, I recommend going to Fushimi Inari Shrine. This is one of the most famous and renowned monuments of Japan: a pathway through the mountain paved with thousands of red Torii gates.
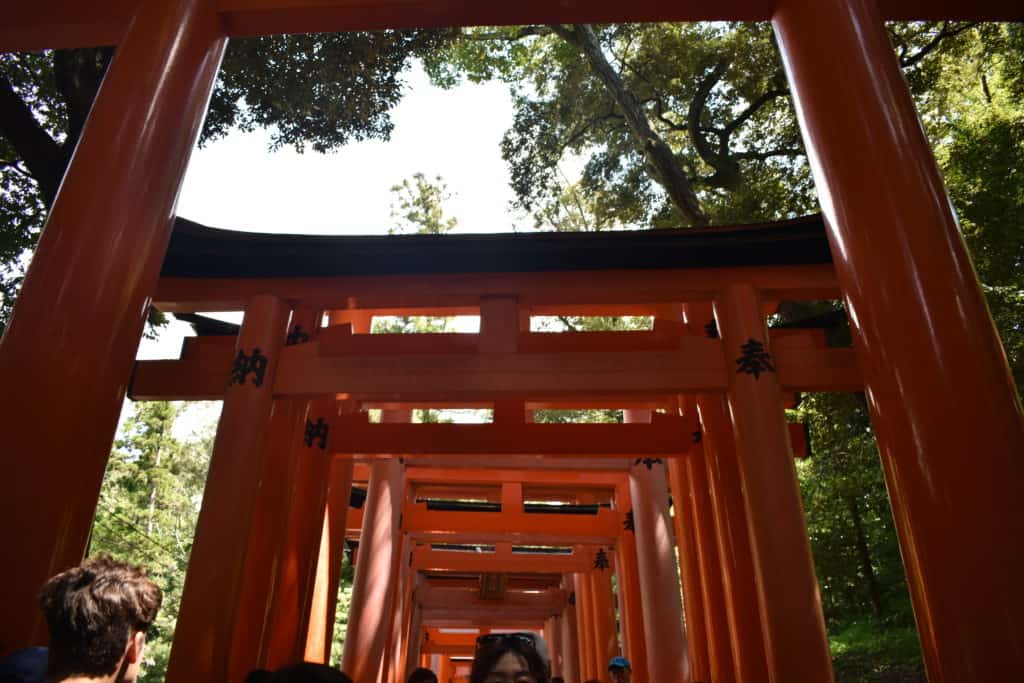
The best way to get there is to take the San-In JR Line from Saga-Arashiyama Station to Kyoto Station. There, you should transfer to the Nara JR Line to Inari Station.
Again, there will be a lot of tourists here. And again, the further along the path you go, the fewer tourists will be there with you. On the trail toward the Fushimi Inari Shrine, there are smaller shrines on the way to the top. After each shrine you pass, you will notice that a significant number of people give up. Those people decide to turn back instead of pursuing the hike to the top.
As a consequence, I recommend going as high up the mountain as you can. The entire hike to the top and back takes between 2 and 3 hours, depending on your speed.
Admission to the shrine complex is free and the complex is always open.
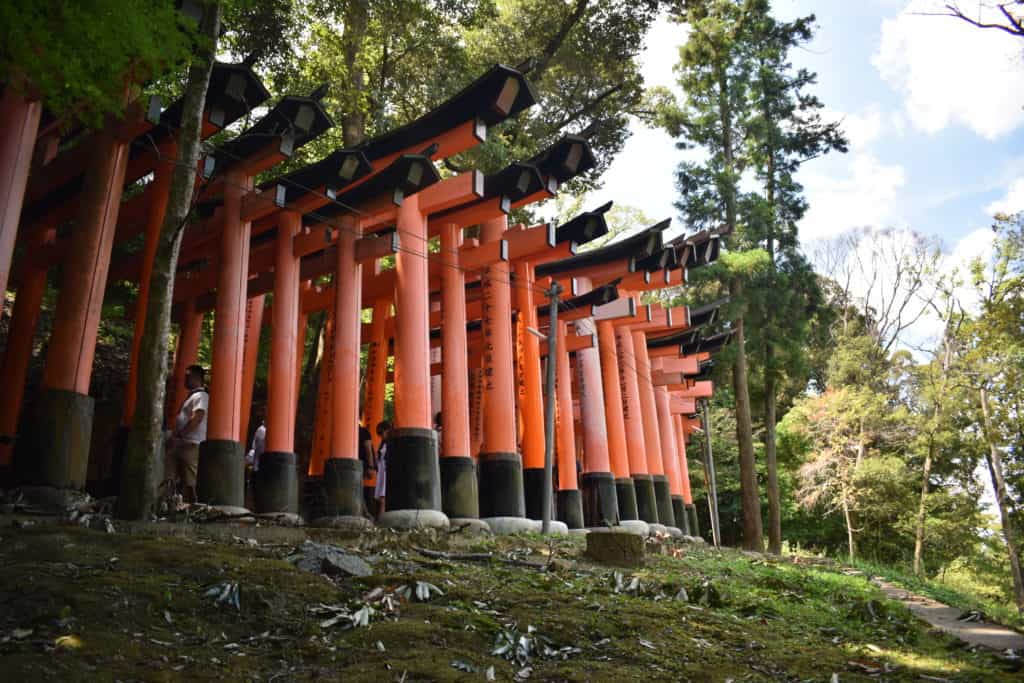
After taking a train from Osaka to Kyoto and visiting the Arashiyama Bamboo Grove and the Fushimi Inari Shrine, your morning has probably come to an end.
Now it’s time to find a restaurant for lunch. I highly recommend trying out okonomiyaki – a savoury pancake filled with a variety of ingredients – at one of these restaurants.
When you’re all lunched up and ready to go, head on over to Gion. This is the traditional Geisha neighbourhood of Kyoto. Admittedly, I had expected more of this, so I wouldn’t blame you if you skipped this and replaced it with another activity. I also won’t be able to give you directions to Gion, because that entirely depends on where you went for lunch. Just look it up on Google Maps and you’ll be golden.
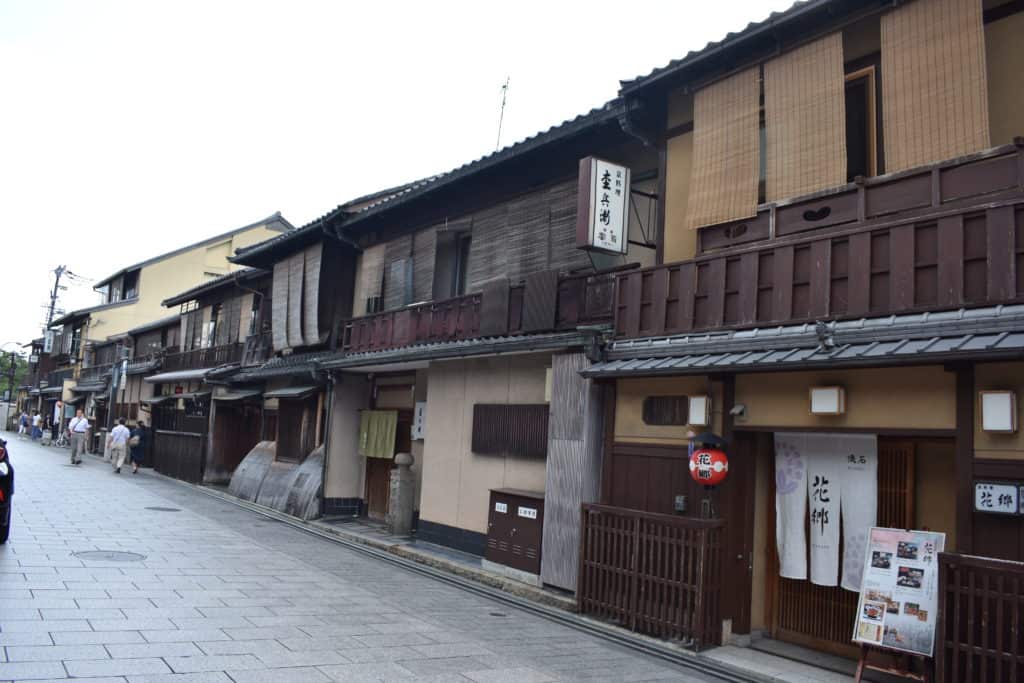
There’s a reason why I didn’t really enjoy Gion as much as I thought I would. It was very obviously aimed at foreign tourists. For example, if you see someone walking around in a yucata (traditional Japanese dress), there is no way to distinguish a genuine geisha from a tourist wearing a rental yucata.
If you are going to Gion, you might want to consider combining this visit with a leisurely stroll through Kyoto’s Higashiyama District. This district is one of Kyoto’s best preserved historic neighbourhoods.
By now, it’s about time to head back to Osaka, unwind a little and find a restaurant for dinner.
We had dinner with an Australian man named Michael who used to work with my dad. He now lives in Japan with his lovely Japanese wife and their two adorable daughters. It was very refreshing to have dinner with people who know the ins and outs of Japanese culture. Their stories about living and working in Japan fascinated me.
When this lovely get-together was over, we parted ways and my family and I headed back to the Airbnb for one last night in Osaka.
As a reader of this blog post, chances are that you’re confused. You might think something along the lines of “How dare you call this an Osaka itinerary? You were barely even there!” and I’d have no choice but to agree with you.
We didn’t spend a lot of time in Osaka. The reason is that my dad had told me that there wasn’t really that much to do there. If you feel cheated now, I sincerely apologise.
However, the point of this blog post was to inform you about our first five days in Japan.
That being said, I would love to come back to Osaka and explore the city itself, since, you know, we didn’t really do that.
In any case, I want to finish this blog post by saying this. You’re a true warrior if you got through the whole thing. I appreciate it a lot.
Thanks for reading!
-S
PIN IT!

As a foreigner from the other side of the world, I quickly found out that Japanese culture is very different from western culture. That’s why I decided to make this post, telling you about the things you should know before visiting Japan. Even after spending only five days here, I found out some things that you should keep in mind when walking through the streets of this Asian island.
I know, it’s difficult to set aside your own cultural bias and see things the way someone from an entirely different culture does. But isn’t that what makes it worth it?
Anyway. Here are 11 tips and tricks that are guaranteed to make your trip to Japan happen without any awkward moments.
Latest update: 15 May 2019
Even though the possibility of getting fined shouldn’t be your only incentive for not littering, you might want to hold on to your trash a little bit longer. Littering on the street will get you a fine of 30.000 yen (about €230/$270).
Similarly, smoking outside of designated smoking areas is very much frowned upon. If you smoke outside at a place you’re not supposed to, you’ll receive a fine of 1.000 yen (about €7,7/$9). It might not seem like a lot, but you’d still be paying more than you would have paid if you hadn’t smoked at all.
That being said, smoking isn’t prohibited in Japan, but it’s just very restricted. To me, it was funny how nobody smoked on the street, but people were allowed to light up a cigarette inside a restaurant or a bar.
My dad has been travelling to Japan for work since the nineties. He told me that it used to be nearly impossible to visit Japan as a foreigner who doesn’t speak any Japanese.
However, we quickly noticed that Japan is actively trying to attract English-speaking visitors. On a train ride, most major train stations are announced both in Japanese and English, some restaurants have an English menu and often have at least one waiter who knows enough English to take your order.
Even if the restaurant doesn’t have an English menu, you can still get a pretty good image of what you can expect through the pictures. Pointing at a picture and nodding at the waiter is more or less a universal thing, I’d say.
And if the menu doesn’t have any pictures, you can still use Google Translate to tell the waiter to surprise you and bring you anything (like we did on our first night in Osaka).
Outside of the culinary world, you can get away with guessing what everything says surprisingly well. If you’re looking at an information board, it’s easy to spot the prices of what you want to visit. Usually, they’re the only numbers on there. And yes, Japan uses the same numbers as western countries.
Yes, you’ll probably pay more for your flight than you would on a weekend trip to the next state/country over. However, Japan is not as expensive as many guidebooks and articles would have you believe.
If you budget your trip well and plan everything in advance, you’ll get to visit one of the most amazing countries on earth without breaking the bank.
In order to save money in Japan, here are some things you can do:

If your electrical outlets don’t look like this, your plugs won’t fit in Japan.
People from North and Central America should have no problem fitting their plugs into these outlets, but anyone who uses other plugs will need to get a plug adapter.
You should also note that the voltage in Japan (100V) is different from North America (120V) and Europe (230V). That basically means that your appliances might not work optimally when plugged into a Japanese outlet.
In most cases, this is nothing to worry about and your devices won’t be damaged. Just to be safe, make sure the label on your device says something like “INPUT: 100-240V, 50/60 Hz”. This means that it can be used and charged in every country (and it’s pretty common nowadays).
You can’t leave Japan without trying some of their wonderful local cuisine.
During my two weeks in this country, I ate many things that I don’t normally eat in Belgium, and I encourage you to do the same.
Food is one of the main expressions of culture, and why would you be travelling if not to get a taste (pun intended) of other cultures?
You can find some of my recommendations below.
Also, the crazy flavours of candy and chocolate are actually a thing. If you’re not going to try them in Japan, you might as well not come at all.

When we came home, my sister and I made candy that looked like sushi. Yes, we made candy. (Side note: it didn’t taste great but we had the best time making it)
Japanese waiters, or any other service workers, don’t expect to be tipped. They often see it as an insult to their service and might even refuse the tip.
As good service is considered to be the standard in Japan, they don’t see why tipping would be necessary.
No matter how customary it might be in your home country (yes, United States, I’m looking at you), you should probably refrain from tipping service workers. Whereas service workers in the States more or less depend on tips for their salary, Japanese workers are fairly compensated and they don’t need, much less expect a tip.
Anyone used to eating with a knife and fork could have a hard time getting food to their mouth in Japan.
I won’t explain how to use chopsticks in this blog post, but I will refer you to this article which explains it marvellously.
If you’ve never used chopsticks before, you may find it easier to learn using training chopsticks (they’re made for Asian kids, but nobody will care if they see you using them as an adult).
Although the Japanese government seems to be making efforts to attract English-speaking tourists, the common folk is still pretty bad at English.
I’m not saying they won’t understand you. I’m not even saying they won’t be able to have a basic conversation with you. But you really shouldn’t expect a lot more than that basic conversation.
Then again, you’re probably not in Japan to talk English. It’s all just a part of the charm of Japanese culture.

Bonus: you’ll get some laughs out of translations made with Google Translate (or its Japanese equivalent).
Wherever you’re staying in Japan, it’s very unlikely that you’ll need a rental car. Period.
If you plan on spending a lot of time in major cities, you’ll be fine using trains, taxis and your feet.
If you want to hop from one city to the next, I recommend using Japan’s network of high-speed trains, Shinkansen. Most Shinkansen lines are covered by your JR Pass, but I recommend booking tickets in advance. It’s not necessary, but at least you’ll be guaranteed a spot on the train.
The trains work like a charm. They’re almost never late because they’re operated by seven privately-owned companies (who work together in the Japan Railways Group). If they are late, the delay is announced and explained in other trains, which is more than can be said for other countries (not-so-subtle reference to how badly public transport in Belgium is organised: check).
Either way, the chances of you needing a rental car are pretty slim.

Yes, the trains are a pleasure to use and they’re very well organised.
And yet, to an outsider like me, it was still a bit confusing at first.
If you have a JR Pass, as I suggested before, you can pretty much take any JR train in Japan. (That’s why the JR Pass is such a good deal, duh.)
Where Japanese commuters are able to open the turnstile by scanning their card, you won’t be. Luckily, you’ll find a clerk nearby all turnstiles and they’ll let you through after you show them your JR Pass. Sometimes they don’t even want to put in the effort of actually looking at your pass and you can just walk through like that.
It might take you a few days to get used to how public transport in Japan works, but once you get it, it’s easy.
These were my things to know before visiting Japan.
Now, you’re all ready to explore the beautiful country of Japan. Enjoy your time there and be sure to send me pictures if you do visit.
Thanks for reading!
-S
PIN IT!


Design by NXNW.